TL;DR: This article introduces five common methods for how to edit audio. Each tool has its own advantages:
Whether you're producing a podcast, editing a video soundtrack, creating music, or processing voice recordings, knowing how to edit audio is an essential skill. Audio editing allows you to remove unwanted sections, adjust volume levels, add sound effects, reduce background noise, and make your recordings sound more polished and professional. Today, a wide range of audio editing tools are available for Windows, Mac, and online platforms, making it easy to edit audio files even if you have no prior experience.
In this guide, we'll walk you through several common methods to help you learn how to edit audio quickly and efficiently.
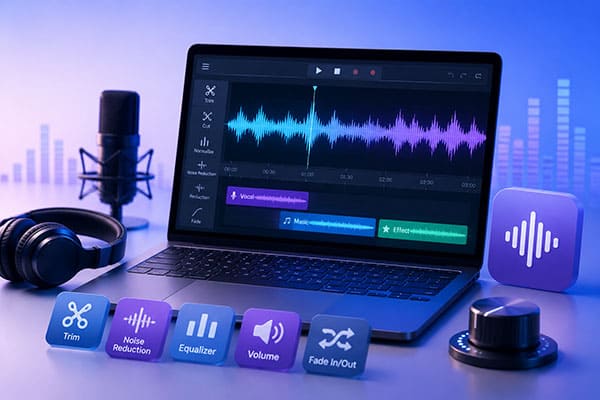
If you are looking for a feature-rich yet easy-to-use audio editing software, Video Converter Ultimate is a highly recommended choice. Although it is widely known as a video conversion tool, it also offers a variety of powerful audio editing features, including audio compression, volume enhancement, audio synchronization, audio trimming, format conversion, and more.
It supports thousands of audio and video formats, including MP3, AAC, WAV, FLAC, M4A, OGG, and others. Whether you need to perform simple audio cuts or advanced audio processing, it can handle the tasks with ease, making it suitable for both beginners and professional users.
Key features of Video Converter Ultimate:
Here is how to edit audio files on a computer using Video Converter Ultimate:
01Download and install Video Converter Ultimate on your Windows PC or Mac. Launch the software and click "Add Files" to import the audio you want to edit.
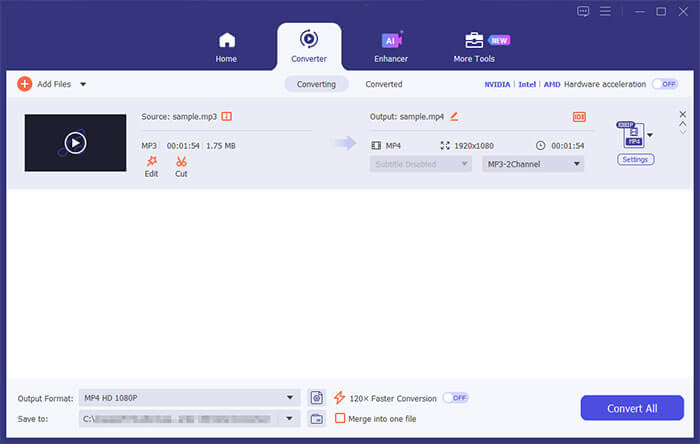
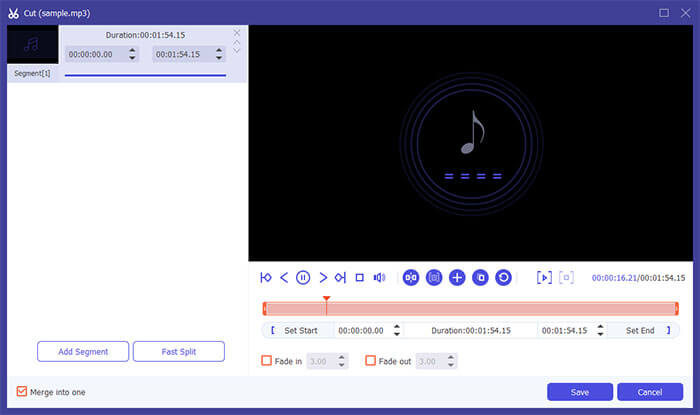
02Click the "Cut" icon to open the built-in editing window. Drag the timeline handles or enter the exact start and end times to trim the audio. If needed, you can also split a long recording into multiple clips. Finally, click the "Save" button to apply the settings.
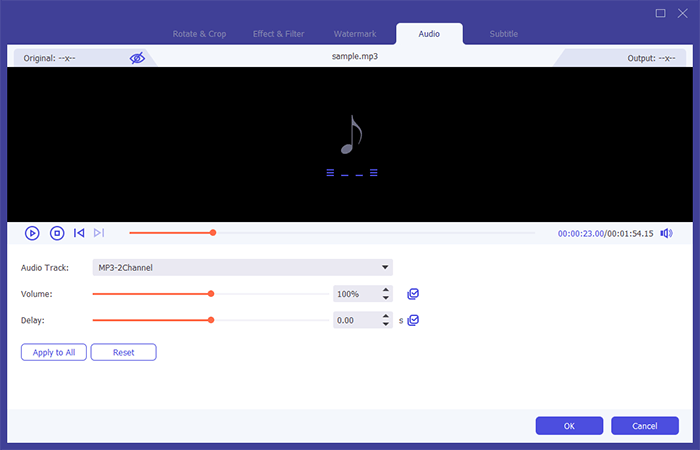
03Click the "Edit" icon to open the "Audio" editing window, where you can adjust the volume and change the delay time to determine when the audio track starts playing. Then click the "OK" button to save the settings.
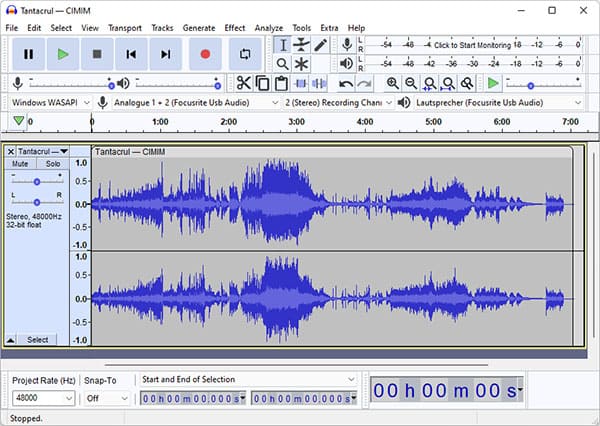
If you're searching for how to edit audio free, Audacity is one of the most recommended options. As a free and open-source audio editor, Audacity is available for Windows, Mac, and Linux, making it a favorite among podcasters, musicians, teachers, and content creators. One of its biggest advantages is its professional editing capability. It supports multi-track editing, noise reduction, equalization, compression, audio restoration, and dozens of audio effects.
Although the interface isn't as beginner-friendly as some commercial tools, it offers much more flexibility for users who need detailed editing.
Here is how to use Audacity to edit audio:
Step 1. Download and install Audacity from the official website, then launch the program on your computer.
Step 2. Click "File" > "Import" > "Audio" to add the audio file you want to edit. You can also drag and drop an audio file directly into the Audacity interface.
Step 3. Select the audio section you want to modify by dragging your mouse over the waveform. You can cut unwanted parts, delete silent sections, or copy and paste audio clips as needed.
Step 4. Click the "Cut" button or press "Ctrl" + "X" (Windows) / "Command" + "X" (Mac) to remove the selected audio. Use the "Delete" key to permanently remove unwanted sections.
Step 5. Use the "Effect" menu to improve your audio quality. You can apply features such as "Noise Reduction" to remove background noise, "Normalize" to balance volume, and "Compressor" to make the sound more consistent.
Step 6. Adjust the audio volume by selecting the track and using "Effect" > "Amplify" to increase or decrease the sound level.
Step 7. Add additional audio tracks by choosing "Tracks" > "Add New" and importing background music, voice recordings, or other sound effects. You can use the "Mix" and "Align" tools to combine multiple tracks.
Step 8. Use the selection tool and editing tools to move, split, or rearrange audio clips until you achieve the desired result.
Step 9. Preview your edited audio by clicking the "Play" button and make further adjustments if needed.
Step 10. Click "File" > "Export Audio" to save your edited file. Choose your preferred format, such as MP3, WAV, or FLAC, and adjust the export settings before completing the process.
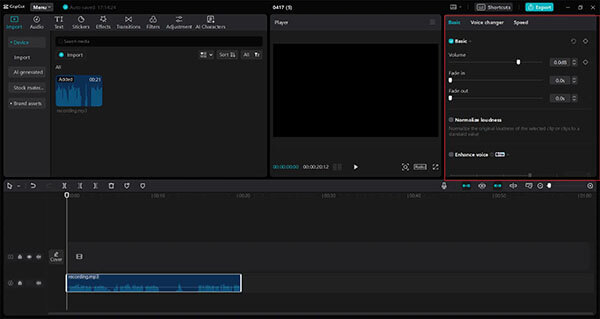
CapCut has become one of the most popular editing apps for TikTok, YouTube Shorts, and Instagram Reels. Although it is mainly known as a video editor, it also offers surprisingly powerful audio editing features. You can easily trim audio, split audio clips, adjust volume, apply fade-in and fade-out effects, reduce background noise, and synchronize music with videos.
Here is how to edit audio on CapCut:
Step 1. Download and install CapCut, then open it and create a new project. Click "Import" to add your audio or video files, or drag and drop them directly into the timeline.
Step 2. To record audio in CapCut, use the "Voiceover" feature and tap the "red button" to start recording.
Step 3. Select the recorded audio to access editing tools. You can adjust volume, apply fade-in and fade-out effects, reduce background noise, detect beats, change your voice with effects, and adjust speed, duration, and pitch.
Step 4. Once editing is complete, click "Export" to save your file or share it directly on platforms like TikTok and YouTube.
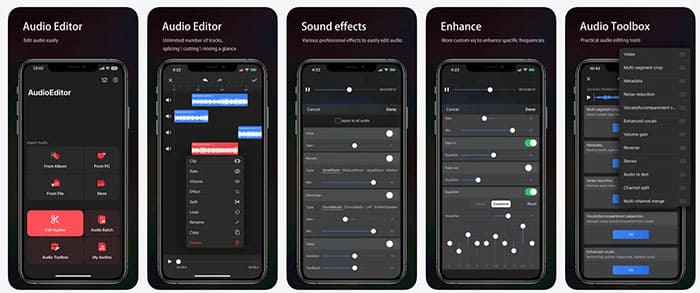
If you want to know how to edit audio on iPhone, Audio Editor - Music editor is a great choice. It is a simple yet powerful audio editing app for iPhone and iPad. It allows users to easily cut, trim, merge, mix, and enhance audio files with features like noise reduction, voice effects, equalizer adjustments, and format conversion. With support for multiple audio formats and various editing tools, it is suitable for creating music, editing recordings, and processing audio clips quickly on mobile devices.
Here is how to edit audio files on your phone via Audio Editor - Music editor:
Step 1. Download and open Audio Editor - Music editor on your iPhone, then tap "Edit Audios" to start.
Step 2. Import an audio file from "Album", "File", or other available sources.
Step 3. Select the audio track to trim, split, merge, copy, or delete unwanted parts.
Step 4. Use editing tools to adjust volume, playback speed, add sound effects, apply fade-in/fade-out effects, and customize the equalizer.
Step 5. Use the "Audio Toolbox" to reduce noise, enhance vocals, separate vocals and music, or convert audio formats.
Step 6. Preview the edited audio and save the final file to your iPhone.
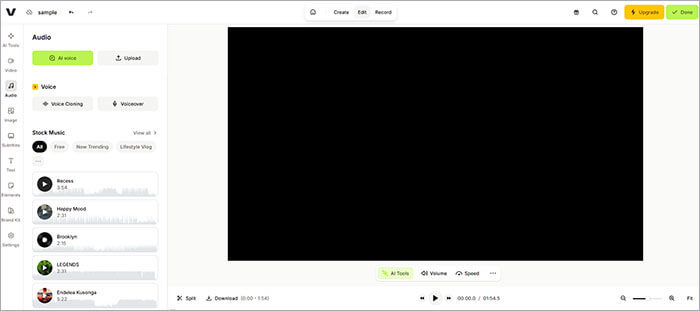
If you don't want to install any software, you can edit audio online directly with VEED.IO. It works directly in your browser, and you only need to upload your file to start editing, making it ideal for users who occasionally need to process audio.
Here is how to edit audio online for free via VEED.IO:
Step 1. Open the VEED.IO website in your browser and create a free account or start editing directly if available.
Step 2. Click "Upload Your File" to add the audio file you want to edit. You can also drag and drop the file into the editor.
Step 3. Select the audio track on the timeline, then trim, split, or delete unwanted parts of the audio.
Step 4. Use the editing tools to adjust volume, add fade-in and fade-out effects, clean up background noise, or add music and sound effects.
Step 5. Preview the edited audio and make any additional adjustments until you are satisfied with the result.
Step 6. Click "Export" to process the file, then download your edited audio or share it online.
The above article has expounded on how to edit audio files using the various methods discussed in this article. Choose a method that suits you best. However, we recommend using the Video Converter Ultimate application as it is easily usable, fast, and reliable.
Related Articles:
Best Android Audio Manager Software in 2026 [6 Tools Reviewed]
Best MOV Editor for Windows, Mac & Online: Top 9 Picks 2026
11 Best MP4 to MP3 Converters for PC, Mac, Online, Android & iPhone
A Comprehensive Guide to Compress MP3 on Computer/iPhone/Online




 Free Download for PC
  Free Download for Mac


