"My grandma passed away recently, and my phone is barely hanging on. I really don't want to lose the voicemails she left me over the years. I'm not sure if iCloud will actually save them, so does anyone know how I can save voicemails on iPhone to computer to keep them safe?"
- from Reddit
Voicemails often contain valuable information, from heartfelt messages from loved ones to important business updates. To ensure they're not lost, saving them to your computer is a smart choice. Doing so keeps them safe and organized, making it easy to back them up when needed. In this guide, we'll show you how to save voicemails on iPhone to computer with some simple and reliable methods. Let's get started!
Most people think of using iTunes to transfer iPhone voicemails. While it works, it will erase music, movies, books, and tones synced from other libraries. Even worse, iTunes saves voicemails in hard-to-read formats, making them difficult to open or play. Saving them this way isn't very useful if you can't listen to them easily.
If you want an easy, reliable, and all-in-one way to manage your iPhone data, Coolmuster iOS Assistant is a great pick. It lets you quickly export voicemails and many other file types from your iPhone to your computer, all through a secure process that keeps your data safe and intact.
Key features of Coolmuster iOS Assistant:
Here is how to transfer voicemails from iPhone to computer via iOS Assistant:
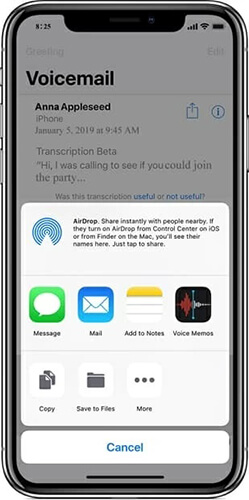
01Open the "Phone" app on your iPhone and tap the "Voicemail" button in the lower right corner. Next, select the voicemail you want to save and tap the "Share" icon. From the list of options, choose where you'd like to save the voicemail - either "Add to Notes" or "Voice Memos".
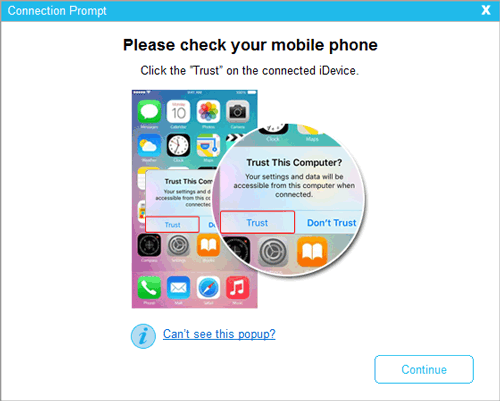
02Download and install iOS Assistant on your PC or Mac. Connect your iPhone to your computer using a USB cable, then launch the program. Follow the on-screen instructions to tap the "Trust" option on your device and click "Continue" in the program to proceed.
03Once your iPhone is successfully connected to the program, you'll see the main interface displaying your device information and the types of files that can be managed on your iOS device.

04Click "Music" > "Voice Memos" in the left panel, and all the voice memos on your iPhone will appear in the right panel. Select the desired voice memos and click the "Export" button to transfer voice memos from your iPhone to your computer.

Video Guide:
Note: If you save voicemails from your iPhone to the Notes app, you can also use iOS Assistant to transfer them, or click here to learn more about how to transfer notes from iPhone to computer with ease.
If you want to keep a copy of your voicemails on your computer, you can do it through iTunes or Finder. Just note that these tools back up your entire iPhone, voicemails included, rather than saving them as individual audio files. So, you won't be able to play them directly unless you use third-party software to extract them later.
Here's how to use iTunes or Finder to back up your voicemails from iPhone to PC or Mac:
First of all, make sure your voicemails are saved in the "Voice Memos" or "Files" app. Connect your iPhone to your computer using a USB cable.
For Windows and macOS Mojave or earlier:
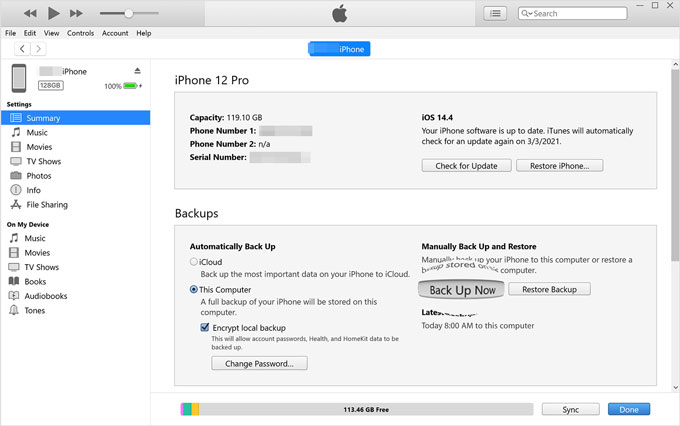
Step 1. Launch iTunes, and once your iPhone appears, click the device icon at the top left.
Step 2. Select the "Summary" tab on the left sidebar, then scroll to the "Backups" section.
Step 3. Choose "This Computer", and click "Back Up Now".
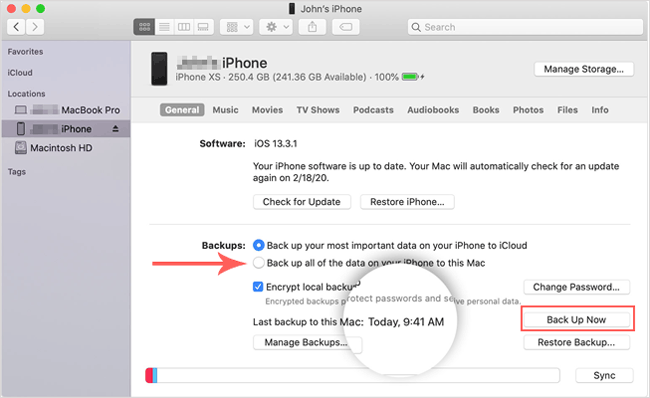
For macOS Catalina or later:
Step 1. Open Finder and select your iPhone from the sidebar.
Step 2. Go to the "General" tab, then find the "Backups" section.
Step 3. Choose "Back up all of the data on your iPhone to this Mac", and click "Back Up Now" to start the process.
Once the backup is complete, your voicemails will be safely stored along with your other iPhone data.
If you prefer using cloud storage services to sync data, iCloud Drive is a great option. You can upload your voicemails to the cloud and then download them to your computer. However, make sure that iCloud Drive has enough storage space and that you have a stable internet connection. (How to free up iCloud storage?)
Here is how to download voicemails from iPhone to computer via iCloud Drive:
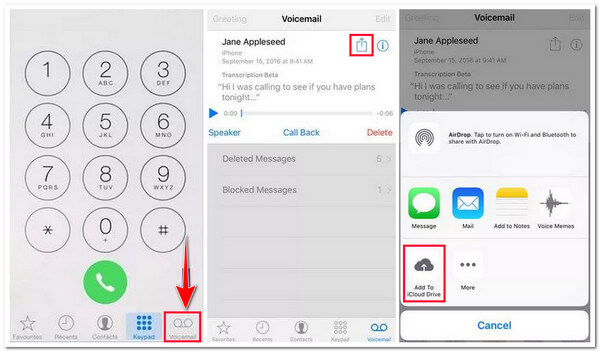
Step 1. Open the Phone app and tap "Voicemail" in the bottom right corner of the screen.
Step 2. Locate and select the voicemail you want to transfer, tap the "Share" button, and choose "Add to iCloud Drive".
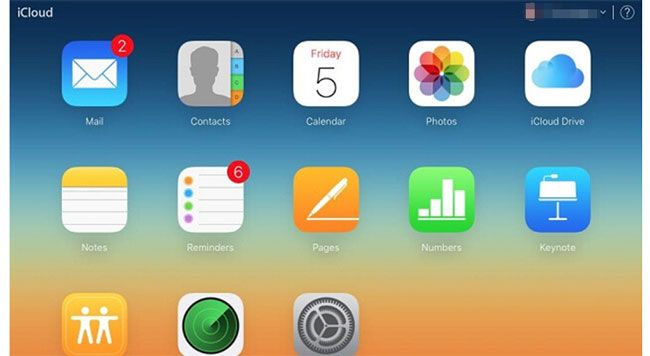
Step 3. On your computer, open a browser and go to iCloud.com. Sign in with your Apple ID and password.
Step 4. Select "iCloud Drive", find the voicemail, and download it to your computer.
If you are using the Apple ecosystem, AirDrop offers a quick and easy way to transfer voicemails from your iPhone to your computer. This feature does not require an internet connection and is ideal for Mac users. If you're using a Windows computer, you may want to consider other methods.
Here is how to save voicemails from iPhone to Mac using AirDrop:
Step 1. Enable AirDrop on both your iPhone and Mac and set it to "Everyone" visibility. (AirDrop not working?)
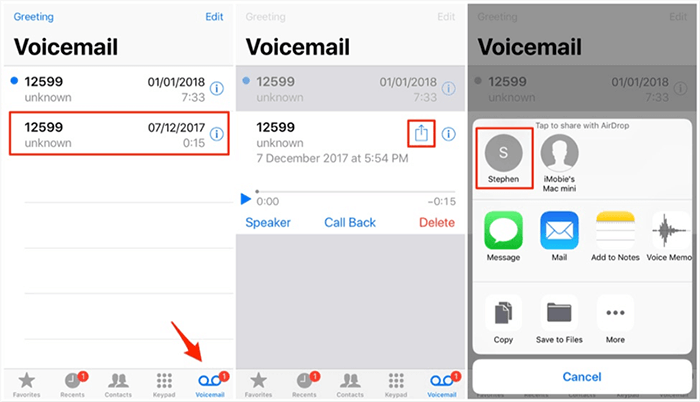
Step 2. Launch the Phone app and select "Voicemail". Select the voicemail you want to save, tap the "Share" button, and choose "AirDrop".
Step 3. In the pop-up device list, select your Mac. Once the transfer is complete, the voicemail file will be saved in the "Downloads" folder on your Mac.
You can also share voicemails from your iPhone directly to your computer via email or message. Here is how to transfer voicemails from iPhone to computer via email or message:
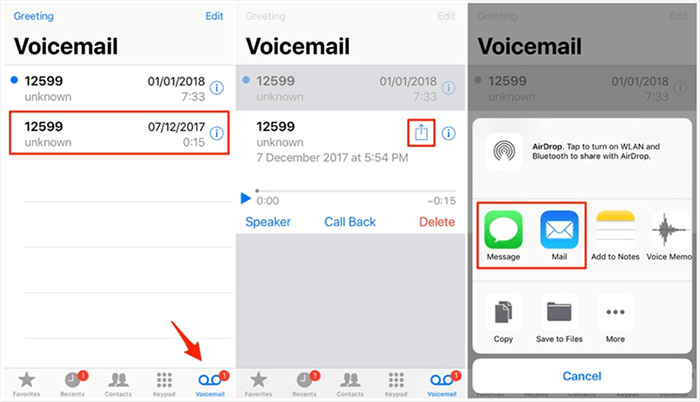
Step 1. Open the "Phone" app on your iPhone and tap on "Voicemail".
Step 2. Select the voicemail you wish to transfer and tap the "Share" button.
Step 3. Choose "Message" or "Mail" to send the voicemail. Enter your own email address or the target device number, then click "Send".
Step 4. On your computer, open the email or message attachment and download the voicemail to your local storage.
Using the methods above, you can easily solve the problem of how to save voicemails from iPhone to computer. Among these methods, Coolmuster iOS Assistant stands out as the top choice due to its professional features and user-friendly operation. If you need to quickly and safely back up voicemails to your computer, consider giving this tool a try!
Related Articles:
[Step-by-Step Guide] Do Voicemails Transfer to New iPhone?
[100% Success] How to Retrieve Deleted Voicemail on iPhone?
How to Recover Deleted Voicemail on Samsung [Effective Ways]
How to Recover Deleted Voicemail on Android? Full Guide in 2025


 Free Download for PC
  Free Download for Mac

