[Step-by-Step Guide] How to Restore Safari Tabs on iPhone from iCloud?

In daily use of the iPhone, the Safari browser is often our primary tool for accessing information and browsing the web. However, there are times when we might accidentally close an important tab or lose previously viewed content when switching devices. This article will provide a detailed guide on how to restore Safari tabs on iPhone from iCloud, helping you easily recover that important information.
To start restoring your Safari tabs from iCloud, make sure that Safari syncing is enabled on your iPhone. Once that's done, you can easily restore Safari tabs from your iCloud backup.
Here is how to restore Safari tabs on iPhone from iCloud:
Step 1. Open the "Settings" app and tap on your name/Apple ID. Then, locate "Safari" and toggle it on to enable syncing.
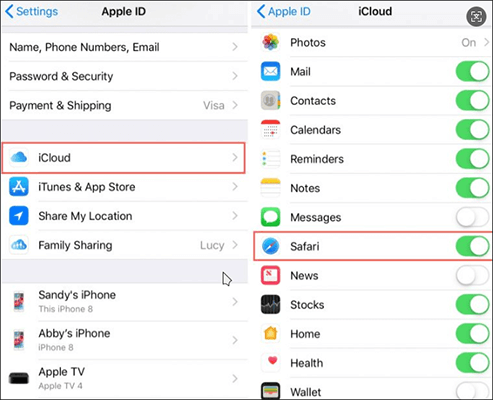
Step 2. Once Safari syncing is enabled, open the Safari browser and tap the "Edit" button on the homepage.
Step 3. Locate and toggle the "iCloud Tabs" option. Then, open Safari again and tap the "Tabs" icon.
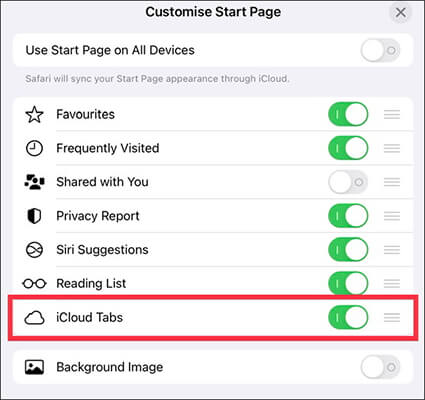
Step 4. You should now see the tabs you had open on other devices.
When we close tabs in the browser, we sometimes need to recover them. Safari offers the "Recently Closed Tabs" and "History" features, making it easy for users to find accidentally closed web pages. Here's how you can do it:
The "Recently Closed Tabs" feature allows users to quickly recover pages that were recently closed without the need to re-enter URLs or search for them. This method is especially useful when a tab is accidentally closed within a short period of time.
Here's how it works:
Step 1. Open the Safari browser on your iPhone.
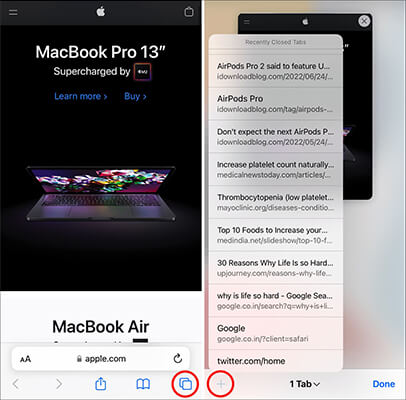
Step 2. Tap the "tab" icon in the bottom-right corner to view all your tabs.
Step 3. Long press the "+" button to see a list of recently closed tabs.
Step 4. Select the tab you want to restore from the list.
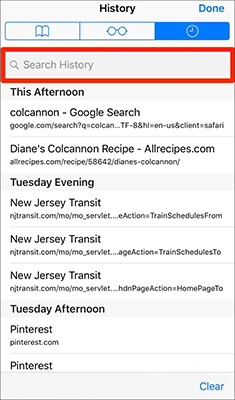
If you want to recover tabs that were closed a while ago, Safari's History feature can help you view all the web pages you've visited in the past, with the option to filter by date. This method is useful for pages that haven't been accessed in a long time.
Follow these steps:
Step 1. Open the Safari browser and tap the "Bookmarks" icon in the bottom row of the screen.
Step 2. Tap the "clock" icon to access your browsing history. Scroll through the list of websites and select the tab you want to reopen.
If you want to recover the deleted Safari history from your iPhone, here is a step-by-step guide you can't miss.
How to Recover Deleted History Safari on iPhone with/without BackupIn addition to Safari tabs, you may also want to recover other data such as photos, contacts, notes, and more. The Coolmuster iCloud Backup Recovery tool offers selective recovery of iCloud backups, allowing you to restore specific data without overwriting the current content on your iPhone. This is ideal for users who want flexible management of their iCloud backup data.
Highlights of Coolmuster iCloud Backup Recovery:
Here is how to use iCloud Backup Recovery to recover from iCloud without reset:
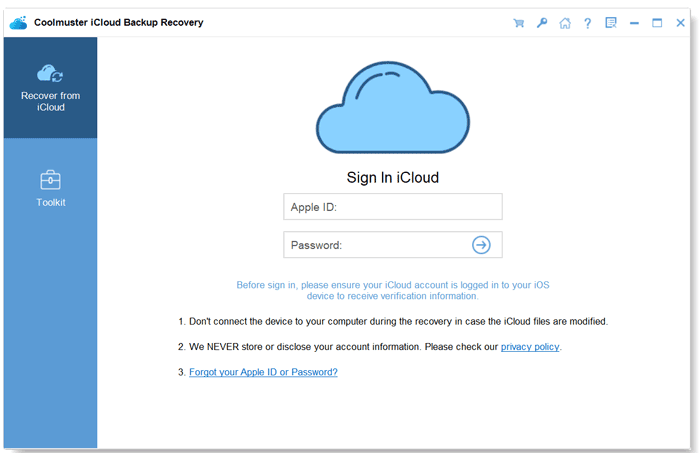
01Download, install, and launch the software on your computer to access the main interface. Enter your Apple ID and password, then click the arrow icon to log in.
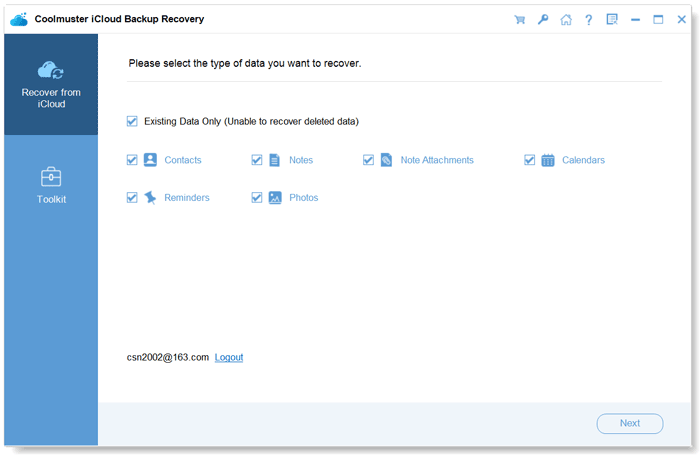
02Select the file types you want to restore and click the "Next" button. The software will scan and display your iCloud backup files.
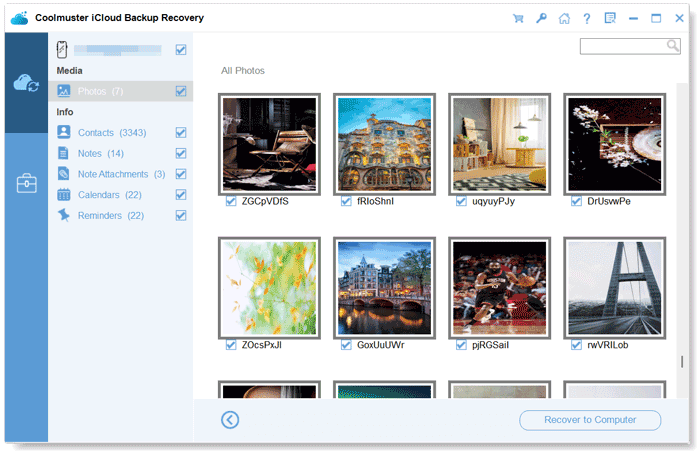
03Then, choose the files you wish to restore and click "Recover to Computer" to save them.
Video Tutorial:
With the methods outlined in this article, you can easily restore Safari tabs from iCloud, whether you've switched to a new device or accidentally deleted data. There are multiple ways to recover the content you need. If you need to restore more data, consider trying Coolmuster iCloud Backup Recovery, which offers more options and convenience for data recovery. We hope these methods help you successfully restore your Safari tabs and other important data.
Related Articles:
9 Ways to Fix the Bookmarks on iPhone Disappeared Issue (iOS 18 Supported)
Easily Restore iPhone from Backup [Contain iTunes and iCloud Backups]
How to Check History on iPad After Deleted with/without Backup?
Smoothly Restore Backup to New iPhone | Practical Ways and Restoring Fixes
