TL;DR: Learn how to screen record on Acer laptop with four simple methods. This guide covers built-in Windows tools and Coolmuster Screen Recorder to help you capture your screen, record audio, and create high-quality videos easily. Whether you need to record tutorials, meetings, gameplay, or presentations, you can find the right solution for your Acer laptop.
Acer laptops are widely used for work, study, gaming, and content creation thanks to their reliable performance and great value for money. However, when creating tutorial videos, recording online meetings, saving gameplay highlights, or sharing step-by-step guides, many users face the same question: how to screen record on an Acer laptop? Below, we will introduce several simple and effective methods to help you easily learn how to screen record on Acer laptop and capture your screen without hassle.
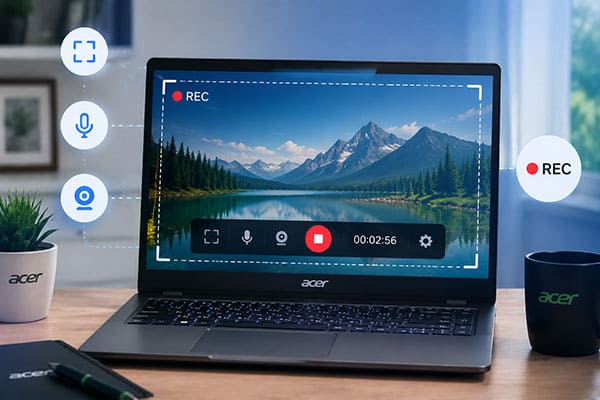
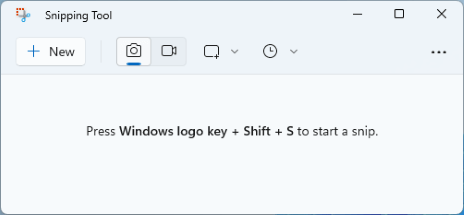
If your Acer laptop has been upgraded to Windows 11, you can use the built-in Snipping Tool to record your screen directly. Compared with the traditional screenshot feature, the Snipping Tool in Windows 11 adds a screen recording function that allows you to quickly capture a specific area of your screen.
Here is how to record your Acer laptop screen using Snipping Tool:
Step 1. Search for Snipping Tool in the Windows search box and open the app on your Acer laptop.
Step 2. Click the "camera" icon at the top to switch to screen recording mode, then select "New" and choose the area you want to record.
Step 3. Click the "Start" button to begin recording, then perform the actions you want to capture on your screen.
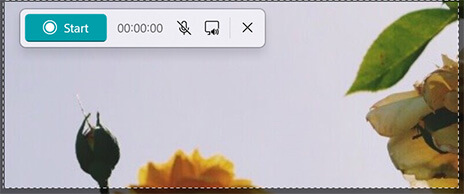
Step 4. Once you finish recording, click the "Stop" button to end the process.
Step 5. Preview the recorded video and save the file to your Acer laptop.
Xbox Game Bar is a built-in screen recording tool available in Windows 10 and Windows 11. Although it was mainly designed for recording gameplay, it can also be used to capture certain application windows. For Acer gaming laptop users, it is a convenient option because no additional software installation is required—you can start recording quickly with just a keyboard shortcut.
In addition to recording gameplay, Xbox Game Bar can capture browsers, media players, and other program windows, while also supporting system audio and microphone recording. However, it has some limitations, such as being unable to fully record the Windows desktop or File Explorer. Therefore, it is better suited for recording content from individual applications rather than the entire screen.
Here is how to screen record on Acer laptop with audio using Xbox Game Bar:
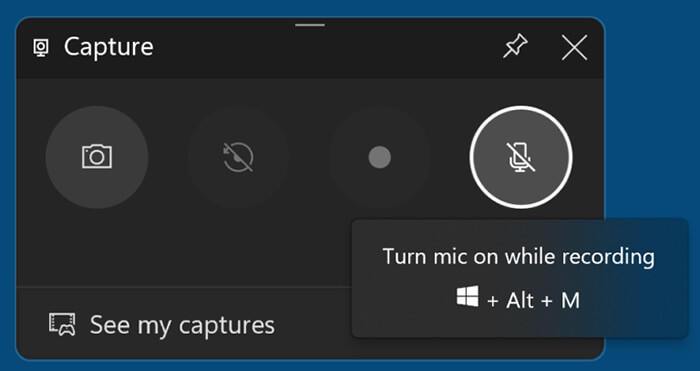
Step 1. Press "Windows" + "G" to open Xbox Game Bar.
Step 2. Click the "Capture" button in the top toolbar.
Step 3. Click the "Start Recording" button, or press "Windows" + "Alt" + "R" to start recording directly.
Step 4. If you need to record audio, click the "microphone" icon to enable microphone recording.
Step 5. When you finish recording, press "Windows" + "Alt" + "R" again to stop the recording.
Step 6. Open the "Captures" folder inside the "Videos" folder to find your recorded video.
Many users don't know that Microsoft PowerPoint also comes with a built-in screen recording feature. If your Acer laptop has the Office suite installed, you can use PowerPoint to complete simple screen recordings directly.
Here is how to screen record on my Acer laptop with Microsoft PowerPoint:
Step 1. Open PowerPoint on your Acer laptop and create a new presentation or open an existing one.
Step 2. Go to the "Insert" tab, click "Screen Recording", then select the area you want to record and enable "Audio" if you need to capture sound.
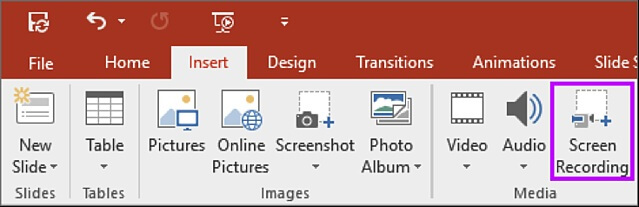
Step 3. Click the "Record" button, wait for the countdown to finish, and start performing the actions you want to capture.
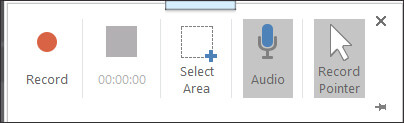
Step 4. When the recording is complete, move your mouse to the top of the screen to display the control bar and click the "Stop" button.
Step 5. The recorded video will be added to the PowerPoint slide automatically. You can edit it if needed or right-click the video and select "Save As" to save it as a separate file.
For Acer users who want a more professional recording experience, Coolmuster Screen Recorder is a more comprehensive option. Compared with the built-in Windows tools, it not only supports screen recording but also allows users to capture system audio and microphone sound, making it ideal for creating YouTube videos, online courses, meeting recordings, and gaming content.
In addition, the software offers multiple recording modes, allowing users to record the entire screen or select a custom recording area based on their needs. With its simple and intuitive interface, even users without professional video editing experience can quickly complete screen recordings.
Key features of Coolmuster Screen Recorder:
Here is how to screen record on Acer laptop without the Windows key using Coolmuster Screen Recorder:
01Launch Coolmuster Screen Recorder on your Acer laptop and select the recording area. You can choose to record the "Full Screen" or a "Custom" region.
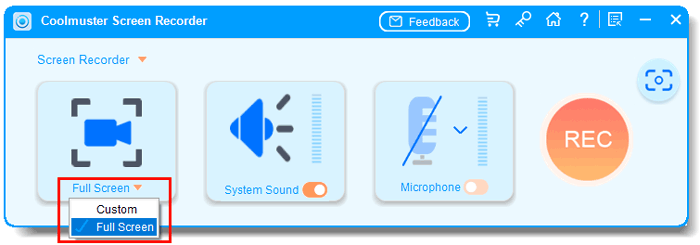
02Choose your preferred audio settings by enabling "System Sound" or "Microphone". You can also turn off audio for silent screen recording.
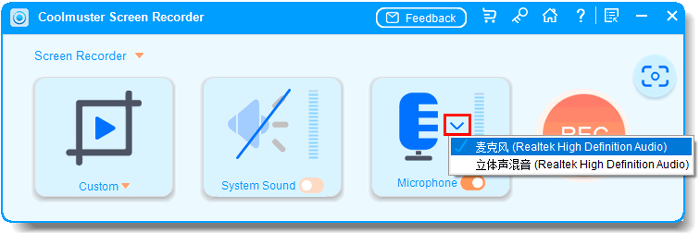
03Click the orange "REC" button and select "Start Recording". The recording will begin after a short countdown.
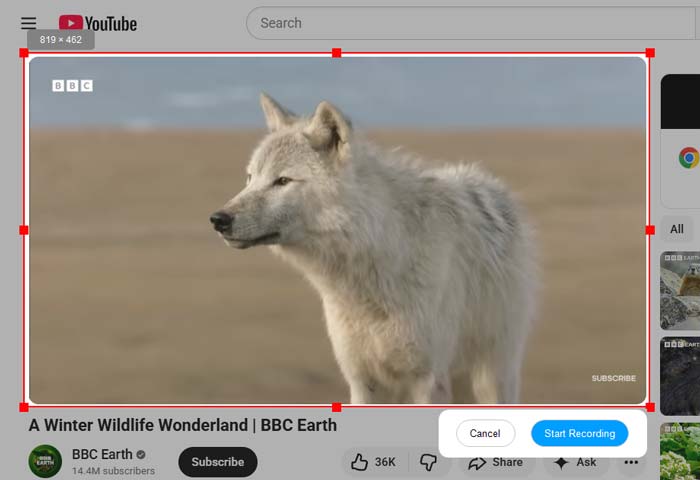
04Once you finish recording, click "Stop Recording". The recorded video will be saved as an MP4 file on your Acer laptop, and you can use the "Copy" option to share it quickly.

Video Tutorial:
Now you know how to screen record on Acer laptop using four different methods. You can choose the most suitable method based on your needs. If you want a simple yet powerful tool that supports high-quality recording and audio capture, Coolmuster Screen Recorder is a highly recommended choice.
It is not only suitable for everyday screen recording but also helps you easily create tutorials, record meetings, capture gameplay videos, and more.
Related Articles:
How to Screen Record on MSI Laptop with Ease: 3 Easy Methods
How to Record Screen on Windows 10 & 11: Step-by-Step Guide
How to Screen Record on Mac Step by Step: Comprehensive Guide
Step-by-Step Guide to Screen Record on Dell Laptop in Minutes






 Free Download for PC


