"I'm using a Dell laptop running Windows 10, and I need to record my screen for tutorials and presentations. However, I'm not sure what the best way to do this is. Is there any built-in options or free software that can help me record my screen smoothly?"
- from Microsoft Community
Looking for the best way to screen record on Dell laptop? Whether you want to capture online meetings, record tutorials, save gameplay, or create presentations, screen recording is an essential feature for many users. Can you screen record on Dell laptop? Of course. Dell laptops (running Windows) support multiple screen recording methods.
In this guide, we'll walk you through 6 proven methods to screen record on a Dell laptop. You can choose the best solution for your needs.
If you want an easy yet professional way to record your screen on a Dell laptop, using dedicated screen recording software is a great choice. Coolmuster Screen Recorder helps users capture screen activities in high quality without a complicated setup. It supports recording the full screen or a custom area, and can capture system sound or microphone audio. The software also offers HD recording with no watermark and allows you to export videos in common formats like MP4, making it ideal for recording meetings, tutorials, gameplay, and online videos.
What can Coolmuster Screen Recorder do for you?
Here is how to screen record on Dell laptop with sound using Coolmuster Screen Recorder:
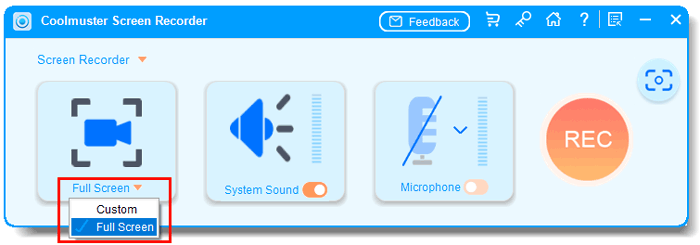
01Open the software and select either "Full Screen" or "Custom" mode to define your recording area.
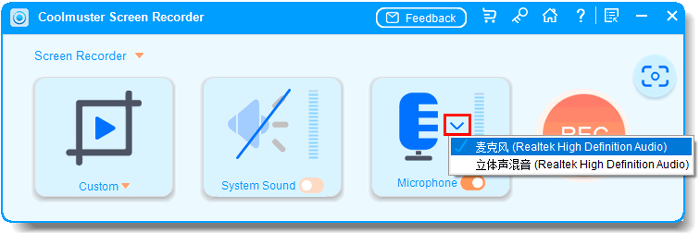
02Set your preferred audio source by turning on "System Sound", "Microphone", or neither.
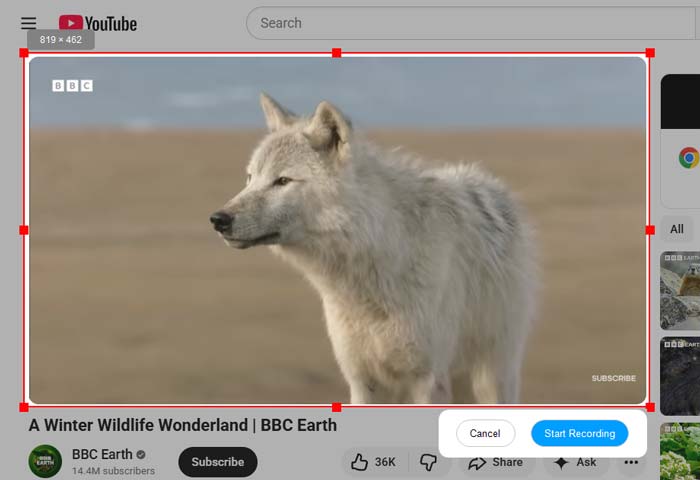
03Click the orange "REC" button, then choose "Start Recording". A short countdown will appear before recording begins.
04When you are done, click "Stop Recording". The video will be automatically saved locally in MP4 format, and you can use the "Copy" feature for quick sharing.

Video Tutorial:
If your Dell laptop is running Windows 10 or Windows 11, the built-in Xbox Game Bar is one of the most convenient screen recording tools for Windows. It requires no download or installation and is ideal for quickly capturing on-screen content.
Originally designed for gamers, it also works well for recording apps and on-screen activities. But keep in mind that it cannot record the desktop or File Explorer.
Here is how to get screen record on Dell laptop with Xbox Game Bar:
Step 1. Open the app or window you want to capture, and then press "Windows" + "G" to open the Xbox Game Bar.
Step 2. Click the "Record" button in the "Capture" widget, or press "Win" + "Alt" + "R" to start recording.
Step 3. To stop recording, click "Stop" or press Win" + "Alt" + "R" again.
Step 4. To view your recording, open the Xbox Game Capture tool and select "Show all captures"—your files are stored in the Captures folder inside your main Videos directory.
If your Dell laptop is running Windows 11, you can quickly record your screen using the Snipping Tool, which now includes basic screen recording features.
Here is how to screen record on Dell laptop without Game Bar using the Snipping Tool:
Step 1. Open the "Start" menu and search for Snipping Tool, or download it from the Microsoft Store if it's not installed.
Step 2. Launch the Snipping Tool, click the "camera" icon to switch to screen recording mode, then click "New" to select the area of your screen you want to record.
![]()
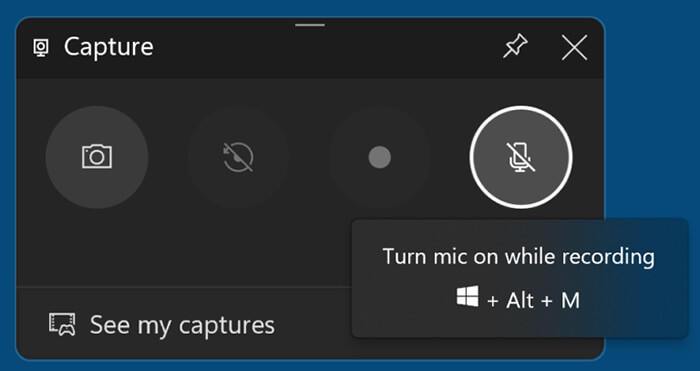
Step 3. On the recording toolbar, click the "microphone" icon to choose your microphone or headset. You can also mute the microphone if you don't want to capture audio.
Step 4. Click "Start" to begin recording your screen.
Step 5. When finished, click "Stop" to end the recording and preview your video directly in the Snipping Tool.

If you already use Microsoft Office, you might not realize that PowerPoint includes a built-in screen recording feature. This makes it a practical choice to screen record on Dell laptop for presentations or tutorials. The recording can be directly embedded into slides, making it perfect for educators and professionals.
Here is how to take a screen record on a Dell laptop via Microsoft PowerPoint:
Step 1. Open Microsoft PowerPoint and create a new presentation or open an existing one.
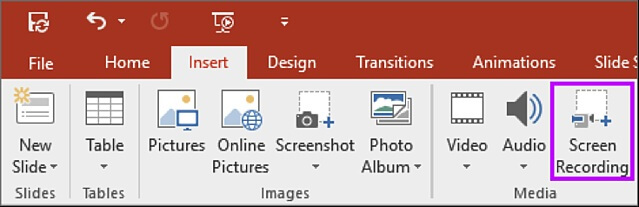
Step 2. Click "Insert" in the top menu, then select "Screen Recording". (PowerPoint screen recording not working?)
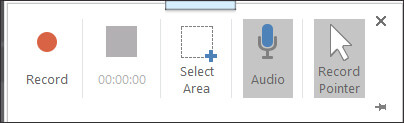
Step 3. PowerPoint will minimize, and a control dock will appear at the top of the screen. Click "Select Area" and drag to choose the part of the screen you want to record, or press "Windows" + "Shift" + "F" to record the full screen.
Step 4. On the control dock, click "Audio" to choose whether to record the microphone sound, and click "Record Pointer" to choose whether to show the mouse pointer.
Step 5. Click "Record" to start recording your screen, then perform the actions you want to capture.
Step 6. When finished, move your mouse to the top of the screen to show the control dock, then click "Stop" (or press "Windows" + "Shift" + "Q").
Step 7. The recorded video will automatically appear in the current slide. Right-click the video and select "Save Media as…" to save it as a separate file.
VLC Media Player is widely known for playing videos, but it can also be used to screen record on a Dell laptop for free. This method is ideal if you already have VLC installed and want a no-cost solution. While it may not be as intuitive as other tools, it still gets the job done for basic recording needs.
Here is how to get a screen record on a Dell laptop for free with VLC:
Step 1. Open VLC Media Player. If you don't have it, download and install it from the official VLC website.
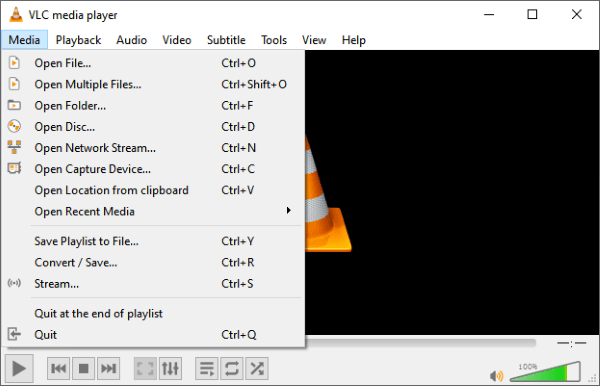
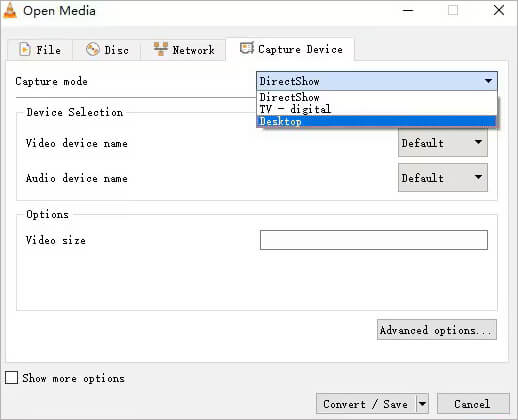
Step 2. Click on "Media" in the top menu, then select "Open Capture Device".
Step 3. From the "Capture" mode drop-down list, select "Desktop", and customize other settings as needed.
Step 4. Next, click the down-arrow next to "Convert/Save" and choose "Convert".
Step 5. Set your destination folder, profile, and other preferences. Finally, click "Start" to begin recording your screen.
If you have higher requirements for recording quality, screen control, and multi-scene switching—such as recording games, live streaming, or creating professional videos—OBS Studio is a powerful choice. OBS offers highly customizable recording settings, allowing you to add multiple audio sources, camera feeds, and different scenes, making it ideal for advanced users.
Here is how to screen record on Dell laptop using OBS:
Step 1. Download and install OBS Studio from the official website if you don't have it already.
Step 2. Open OBS Studio. On the main interface, you'll see "Scenes" and "Sources" panels at the bottom. By default, there's one Scene; you can keep it or create a new one by clicking the "+" under Scenes.
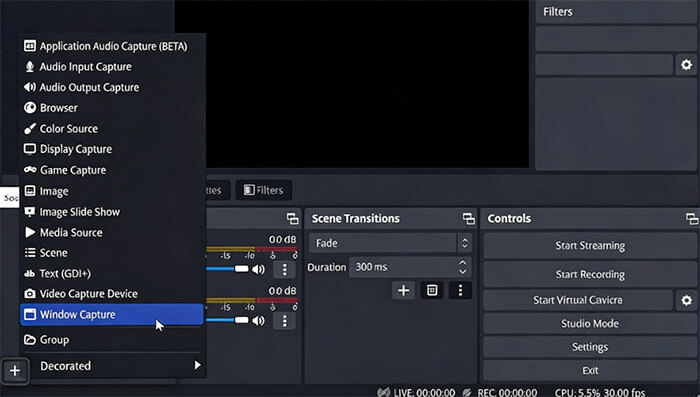
Step 3. In the Sources panel, click the "+" button and choose "Display Capture" to record your entire screen, or "Window Capture" to record a specific application. Give it a name and select the display or window you want.
Step 4. Go to "Settings" → "Output" to set recording quality, format (e.g., MP4), and destination folder.
Step 5. When ready, click "Start Recording" on the bottom-right of OBS Studio. Perform the actions on your screen that you want to capture.
Step 6. Click "Stop Recording" when finished. Your video will be saved in the folder you set in the Output settings.
Overall, there are many effective ways to screen record on Dell laptop, whether you prefer built-in Windows tools or advanced third-party software. Coolmuster Screen Recorder is the most recommended solution for users who want an easier and more reliable recording experience. With its intuitive interface, HD recording quality, and flexible recording modes, it provides an excellent all-in-one solution for recording videos, gameplay, online meetings, tutorials, and more on a Dell laptop.
Related Articles:
How to Screen Record on Mac Step by Step: Comprehensive Guide
10 Best Game Recording Software to Record Gameplay Without Hassle
4 Easy Methods to Recover Deleted Screen Recording on iPhone
Solved: How to Recover Deleted Screen Recording Video on Android Devices


 Free Download for PC

