Are you looking for a way to convert images to PDF? You've come to the right place. Before showing you the best tools to help you do that, let's consider some reasons why you may want to convert images to PDF. Firstly, it enables you to keep your files organized. Secondly, it helps you protect your photos with a password. Lastly, it helps to save space, making it easier to share them in email. Let's now look at seven image-to-PDF converters that you can use.
This part will show you three offline tools to make PDFs from images. Offline tools are best if you want maximum privacy because you don't have to upload any photos to a third-party website. Also, they're convenient because you can use them any time without worrying about the internet connection.
Coolmuster JPG to PDF Converter is an offline application that converts different types of images into PDF. This image-to-PDF converter has easy download and installation steps. It takes minimal computer resources in terms of storage and processing power.
You can start with the free trial that helps you convert images to PDF without adding watermarks. It also allows batch processing, which saves time by converting multiple files simultaneously. The user-friendly interface eliminates the need for training before using the application. It has straightforward steps that complete the process within a few clicks.
Key Features:
Here's how to turn an image into a PDF using Coolmuster JPG to PDF Converter:
01 Download Coolmuster JPG to PDF Converter, install, and launch the application.
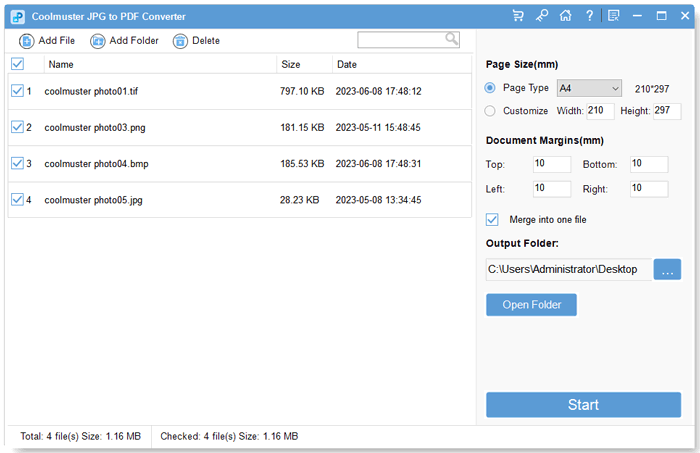
02Click Add File at the top left and search for images from your computer. To add multiple images, press the shift or control key to select the images or click Add Folder to add all images from a folder.
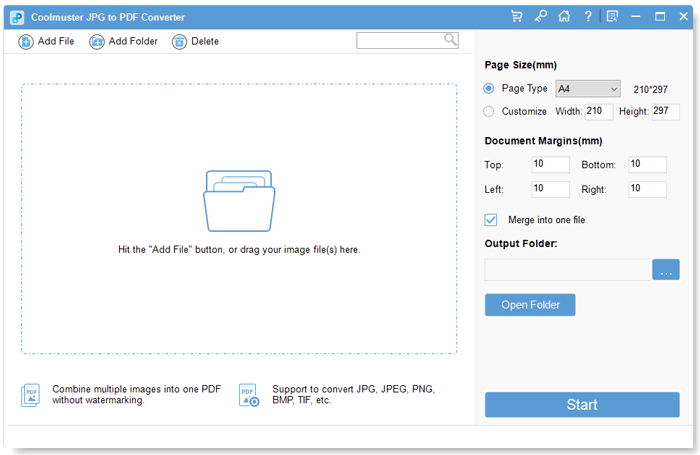
03Set the page size and margins on the right panel according to your requirements. Select the Output Folder by clicking the blue button under Output Folder.
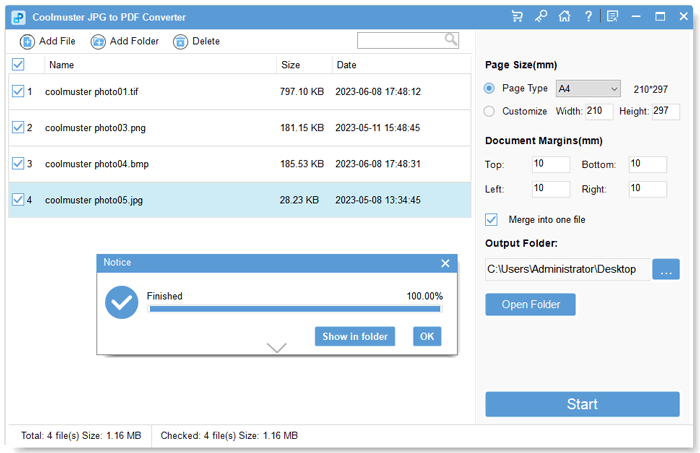
04Click Start to begin the conversion. Within a few seconds, the application will complete the conversion. Check the Output Folder you selected to view the converted file.
Preview is a pre-installed Mac app that allows you to view and edit PDFs and images. It can also convert one image format into other image formats and PDFs. Here's how to use Preview to create PDFs from images:
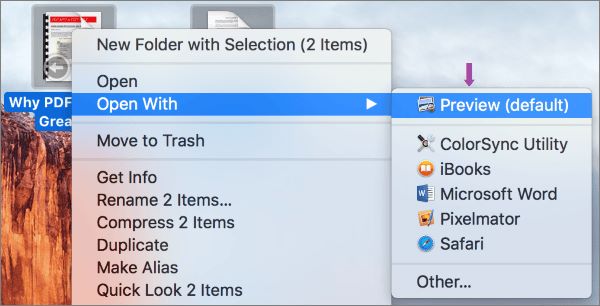
Step 1. Select all the pictures you want to convert to PDF by holding down the Command key and clicking one image at a time. Then, click Open With them using Preview.
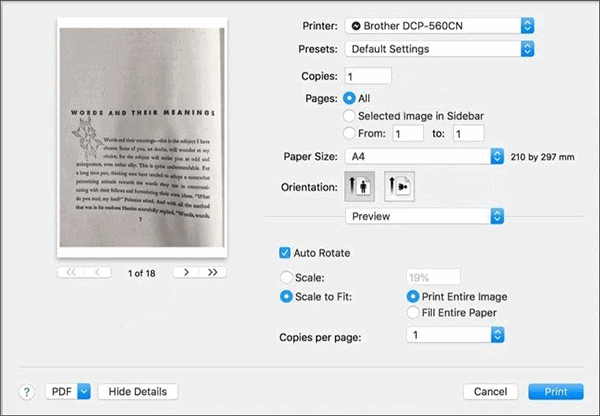
Step 2. Click the Files tab and select Print. On the print dialogue box, click Show Details to reveal more print options, as shown below. You can preview all images by pressing the next button under the preview section. Ensure you set the correct orientation for each page. Click All in the Pages section to convert all images.
Step 3. Click the dropdown menu in the PDF section and select Save As PDF. A Save As dialogue box will appear. Type the file's name and choose a saving location. Click Save once you've entered all the details.
Microsoft PowerPoint is another offline application you can use to convert images to PDF. This software allows you to resize the images and save them in PDF format. Here's how to create PDF from images using MS PowerPoint:
Step 1. Launch MS PowerPoint on your computer. Any version from 2007 has the required features. Click the dropdown menu under New Slide in the Home tab to create several blank slides.
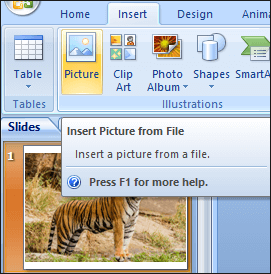
Step 2. Click Insert, then select Picture from the ribbon. Search your computer for the images you want to convert. Add one or several images per slide according to your preferences.
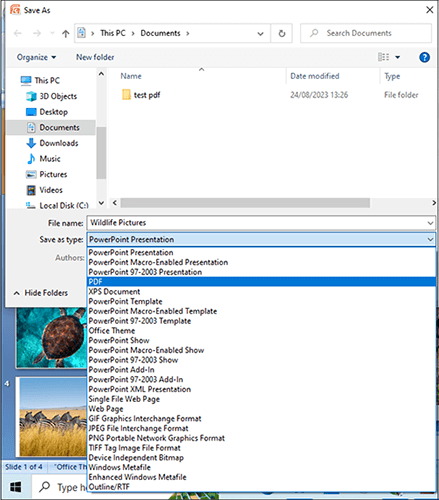
Step 3. Click File on the menu and select Save As. Choose where to save the file on your device. Type the file name and select PDF as the Save as type. Click Save once done.
Note: Want to add image to PDF? You can use these 6 powerful methods.
Online tools can be good alternatives when you're using a mobile device or don't want to install software on your computer. In this section, we'll show you how to convert images to PDF using four online tools.
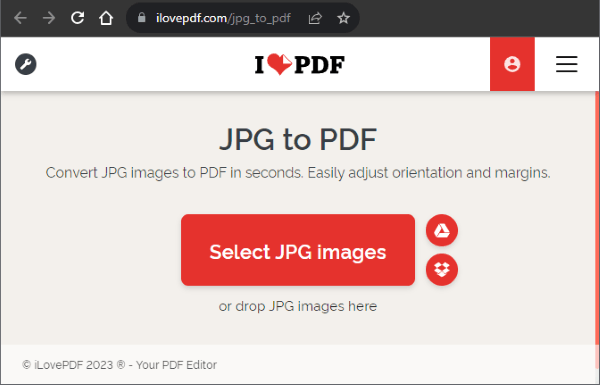
iLovePDF is an online tool that converts images to PDF and performs other PDF functionalities. It allows you to import image files from your computer, Google Drive, and Dropbox. You can upload several images at once by pressing the control or command key when selecting them. Here's how to convert image to PDF using the tool:
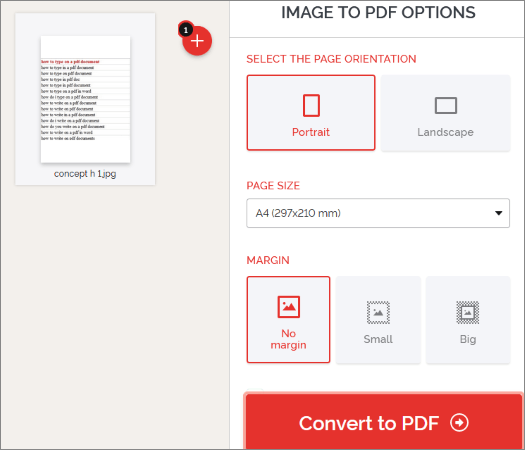
Step 1. Visit ilovepdf.com and select JPG to PDF from the tools grid.
Step 2. Click Select JPG images to upload files from your computer. You can also import pictures from Dropbox and Google Drive by clicking on the icons on the right.
Step 3. Set the page orientation and the margins on the right panel and click Convert to PDF.
Step 4. iLovePDF will convert all the images and place them in one PDF file. The tool will also download the file when ready. If not, click Download PDF.
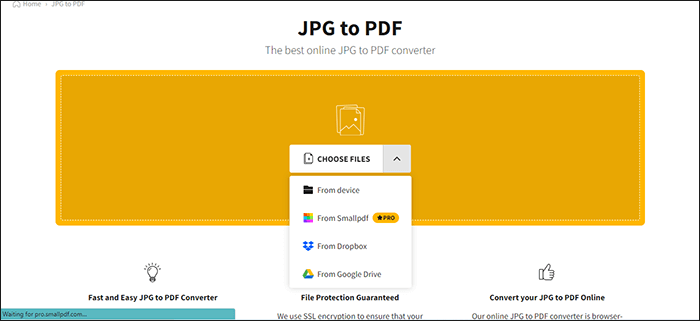
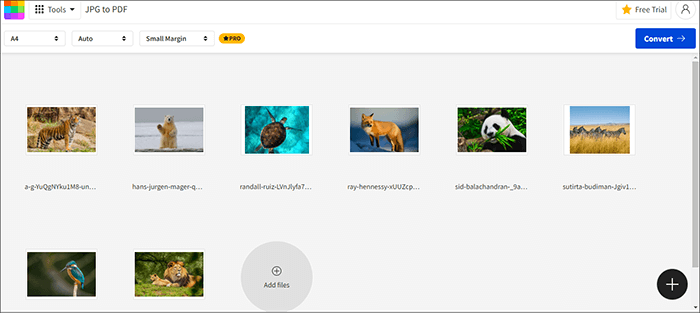
Smallpdf is another online tool that allows you to convert various image formats into PDFs. You can upload photos from your device or the cloud storage. Below are the steps to make PDF from images using this tool:
Step 1. Visit smallpdf.com and click Tools from the menu. Select JPG to PDF from the tools.
Step 2. Click Choose Files to upload images from your computer. Alternatively, drag and drop the images to the tool.
Step 3. Once you upload all the images, click Convert at the top right.
Step 4. Smallpdf will convert the images and place them in one PDF file. Click Download to save the PDF file.
Read More: How can convert JPG to PDF on your computer or mobile phones? Refer to this article to select a professional method.
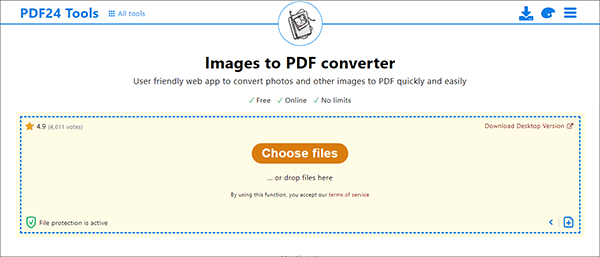
PDF24 is a free online application with multiple PDF tools. You can use it to convert GIF, PGN, JPG, and TIFF to PDFs. Below are the steps to follow:
Step 1. Visit pdf24.org and scroll down to the tools. Click Images to PDF.
Step 2. Click Choose files or use drag-and-drop to upload the images.
Step 3. Once uploaded, click Create PDF to convert the images.
Step 4. After conversion, click Download. Check the download folder for the converted file.
PDF2Go is an online tool that helps you work on PDF files in various ways. It allows you to convert, edit, encrypt, and merge the PDF files. You can use it to convert images to PDF. Unlike other online tools, PDF2Go saves converted images into separate PDF files instead of one. Here's how to turn an image into a PDF using PDF2Go:
Step 1. Visit pdf2go.com and select JPG to PDF from the tools grid.
Step 2. Click Choose File and select the images to upload from your computer. Click the dropdown menu if the images are in cloud storage.
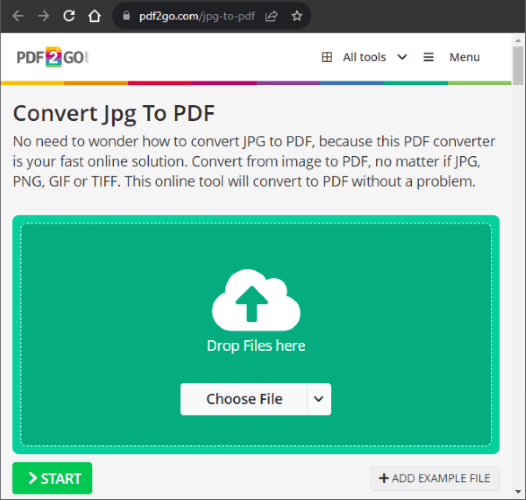
Step 3. The images will be uploaded one after the other. Once uploaded, click Start to begin the conversion.
Step 4. After conversion, PDF2Go will display all the converted files in a list, as shown below. Download each image at a time, or click Download Zip at the bottom to download all the files at once.
We've looked at seven tools that can help you convert images to PDF. There's a reason why Coolmuster JPG to PDF Converter is among the best image-to-pdf converters. It comes with a free trial and converts multiple images simultaneously. Best of all, the images maintain their original quality after conversion. Download Coolmuster JPG to PDF Converter today to convert your images easily and securely.
Related Articles:
[Easy PDF] How to Convert PDF to Image with Top 7 Methods
How to Make a Picture a PDF on iPhone in 5 Quick Methods
How to Scan a Picture to PDF Like a Pro? Your Ultimate Guide


 Free Download for PC

