Screen recorders are essential for creating tutorials, recording online meetings, capturing gameplay, or saving streaming content. Among many options, 4Easysoft Screen Recorder has gained attention for its ease of use and versatile features. In this guide, we'll take a deep dive into its features, pricing, pros and cons, and step-by-step usage. If you're searching for a reliable screen recording tool, this 4Easysoft Screen Recorder review will help you decide whether it's the right choice.
4Easysoft Screen Recorder is a professional screen recording tool for Windows and Mac that supports recording computer screens, system audio, microphone audio, and webcam footage. Whether you're creating tutorial videos, recording meeting content, or capturing exciting moments in games, it provides a stable recording experience. The software also includes various recording modes, such as full-screen recording, area recording, and window recording, and supports real-time drawing and annotation features, making it ideal for teaching and presentation scenarios.
One of the reasons 4Easysoft Screen Recorder stands out is its all-in-one functionality. It's designed to meet different recording needs, whether you're a beginner or a casual content creator. Here are its key features:
Pricing is a crucial factor for many users when choosing screen recording software, and 4Easysoft Screen Recorder offers flexible plans to accommodate different budgets and needs.
Here are three main pricing tiers for Windows and Mac:
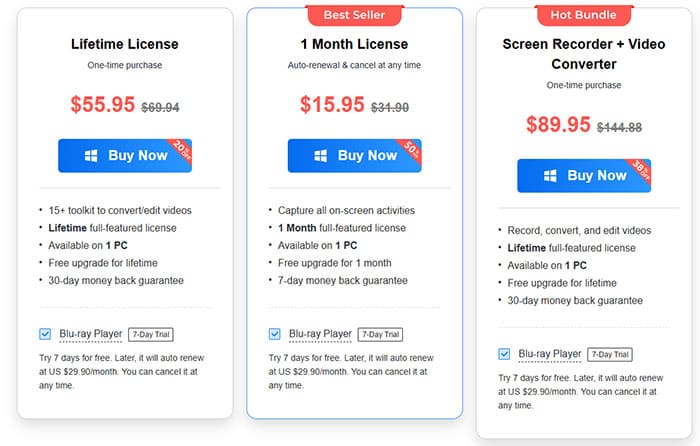
It's worth noting that 4Easysoft also offers a free trial version, which allows users to test the software before purchasing. The free trial includes most core features, but it has a 3-minute recording time limit and lacks advanced features like video trimming, noise cancellation, and voice enhancement.
No software is perfect, and 4Easysoft Screen Recorder is no exception. To provide a balanced 4Easysoft Screen Recorder review, we've compiled the key advantages and disadvantages of the tool, based on user feedback and our own testing. This will help you weigh whether the software's strengths align with your needs and if its weaknesses are manageable for your use case.
Pros:
* User-friendly interface: Even beginners can easily navigate the software, with clear icons and intuitive controls.
* Multiple recording modes: Covers common scenarios like basic screen recording, game recording, and phone screen recording.
* High-quality recording: Supports up to 4K/60 FPS recording, ensuring professional results.
* Advanced audio features: Includes noise cancellation and voice enhancement to improve recording quality.
* Built-in editing tools and real-time annotations: No need for external editing software, saving time and effort.
* Flexible pricing plans: Includes lifetime licenses and a free trial, catering to different user needs.
* Safe and secure: No adware or malware, 100% secure.
* 30-day money-back guarantee: Adds peace of mind for paid purchases, boosting user confidence.
Cons:
* Free trial has significant limitations: Recording time is limited to 3 minutes, and advanced features are missing, making it difficult to fully test the software.
* Occasional recording delays: Some users report delays when starting recordings, which may be related to device performance rather than the software itself.
* No free forever plan: Only a free trial is available, so casual users may find the paid plans unnecessary.
* Advanced editing features are not comprehensive: While there are editing tools, they are not as robust as dedicated video editing software, which could limit professional content creators.
Understanding the features is one thing, but being able to use them effectively is the key. This section will guide you through detailed steps on how to use 4Easysoft Screen Recorder to complete a full-screen recording, making it easy even for beginners. Before starting, make sure you have properly installed the software and have your microphone or other audio devices ready, if needed.
Here is a step-by-step guide on how to record a video using 4Easysoft Screen Recorder:
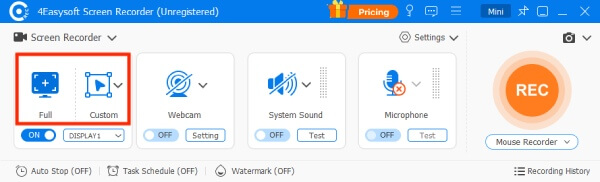
Step 1. Open the 4Easysoft Screen Recorder and click the "Full" button to capture your entire screen, or choose the "Custom" button to select a specific resolution, such as 1080p, 720p, or 480p. You can also freely adjust the borders to fit your preferences.
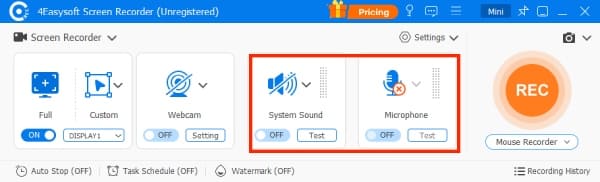
Step 2. If you need to record audio along with your screen, like for conference calls, online lectures, or videos, enable the "System Sound" option. You can also turn on the "Microphone" option to record your voice simultaneously. Don't forget to adjust the volume using the slider.
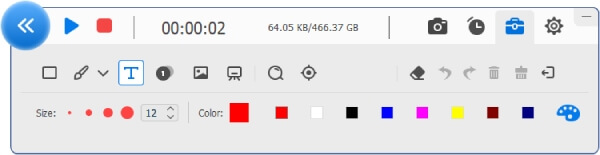
Step 3. Once you've configured your settings, click the "REC" button on the right to begin recording. A toolbox will appear, allowing you to add shapes, lines, callouts, and take screenshots while recording.
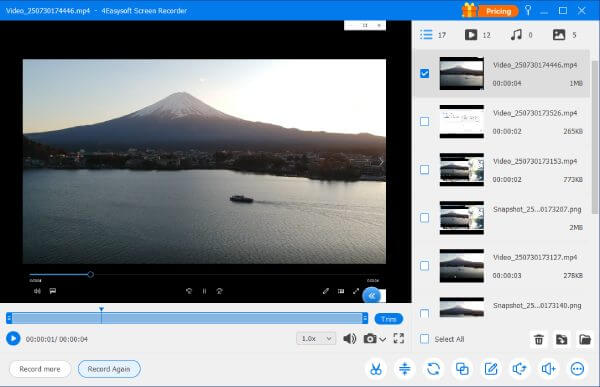
Step 4. When you're finished, click the "Stop" button. In the preview window, you can trim the video and adjust the playback speed. For more advanced editing options like compression and reverse playback, check the tools in the lower right corner. Finally, click the "Save" button to export your recording.
Although 4Easysoft Screen Recorder can meet basic needs, some users may still prefer a lighter, more stable, and beginner-friendly option. One of the best alternatives worth considering is Coolmuster Screen Recorder. This software is designed for users who want high-quality recording without a complicated setup.
What can Coolmuster Screen Recorder do for you?
* Effortlessly record a screen on Windows with audio.
* Record your full screen or a selected area and save videos in high-definition MP4 format.
* Capture system audio, microphone input, or record your screen silently with flexible audio options.
* Enjoy unlimited recording with no watermarks after activation, all while preserving crystal-clear quality in a lightweight, smooth-running app.
* Take full-screen or custom-area screenshots, add annotations like text and shapes, and export them as PNG, JPG, or BMP files.
* Protect your privacy with fully local processing — no uploads, no cloud storage, and no third-party servers involved.
Here's how to record a video using Coolmuster Screen Recorder:
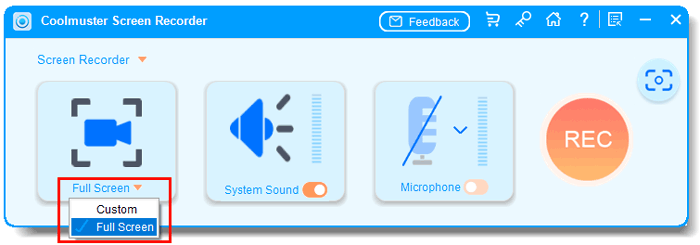
01Launch Coolmuster Screen Recorder and choose your preferred recording mode: "Full Screen" for the entire display or "Custom" to capture a specific area.
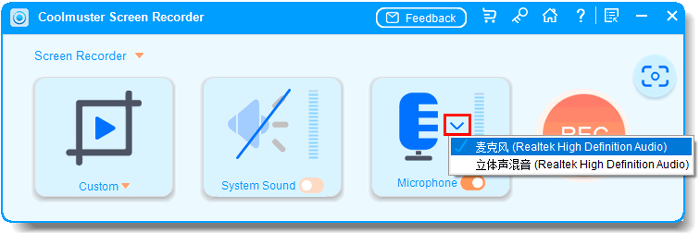
02Configure your audio settings by enabling "System Sound", "Microphone", or neither if you want to record silently.
03Click the orange "REC" button, then select "Start Recording". A brief countdown will appear before the recording starts automatically.
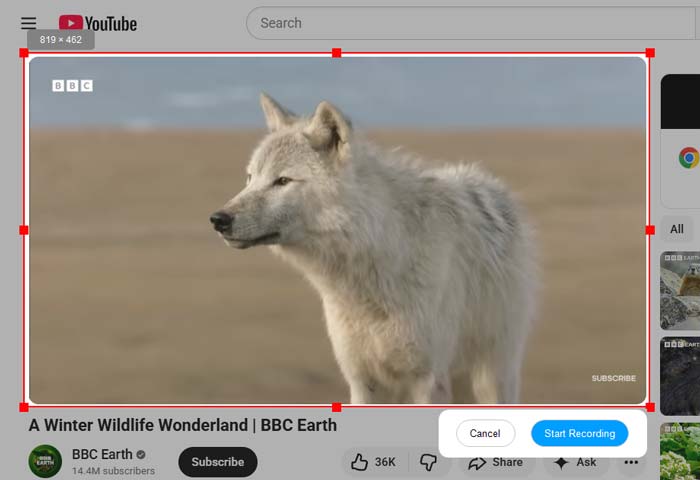
04Once finished, click "Stop Recording" to save your video locally in MP4 format to your selected folder. You can also use the "Copy" option to quickly duplicate the file for sharing or backup.

Video Tutorial:
Q1. What is the difference between the free trial and the registered version of 4Easysoft Screen Recorder?
Both the free trial and the registered version of 4Easysoft Screen Recorder allow you to record videos with audio and take screenshots without a watermark. However, the free trial has a 3-minute recording time limit, while the registered version has no time limit for recording. Additionally, the registered version includes advanced features such as noise cancellation, voice enhancement, video trimming, and scheduled recording, which are not available in the free trial.
Q2. How can I solve the problem of occupied hotkeys?
If your custom hotkeys for 4Easysoft Screen Recorder are occupied by other programs, you can easily change them. After launching the software, click the "menu" icon and select the "Preferences" option. In the pop-up window, click the "Hotkeys" button, where you can replace the occupied hotkeys with your desired keys. This allows you to quickly start, pause, stop recording, or take screenshots without conflicts.
Q3. Where are my recordings saved, and can I change the save location?
When you save your recordings, you can directly choose the desired folder to store them. Additionally, you can change the default output location in advance. Go to the "Preferences" option, select the "Output" tab, and click the "Browse" button to choose a new save location. This allows you to organize your recordings in a folder of your choice, making it easier to find and manage your files later.
In conclusion, this 4Easysoft Screen Recorder review shows that 4Easysoft Screen Recorder is a solid choice for beginners and everyday users who need a simple and versatile recording tool.
However, if you want a more stable and lightweight recording experience with flexible audio options and HD MP4 output, Coolmuster Screen Recorder is a better alternative worth trying. It combines simplicity, performance, and recording quality, making it ideal for both everyday users and content creators.
Related Articles:
Apowersoft Screen Recorder Review 2026: Features, Pricing, Pros & Cons
A Comprehensive AZ Screen Recorder Review and 4 Best Alternatives
Camtasia Screen Recording Software Review & 6 Best Alternatives
Top 8 OBS Screen Recorder Alternative Tools for Easy Recording


 Free Download for PC

