TL;DR:
Want to remove the SIM card from your iPhone but don't know where to start? This guide will walk you through everything you need to know, from removing the SIM card safely to protecting your data before selling your device.
A SIM card allows your iPhone to connect to your carrier's network for calls, text messages, and mobile data. You may need to remove or replace the SIM card when switching carriers, upgrading to a new phone, troubleshooting network issues, or preparing your device for sale.
If you are wondering how to remove a SIM card from an iPhone, this guide will walk you through the process step by step. We will also explain what happens after removing the SIM card and how to fix common issues, such as a stuck SIM tray or removing the SIM card without a tool.
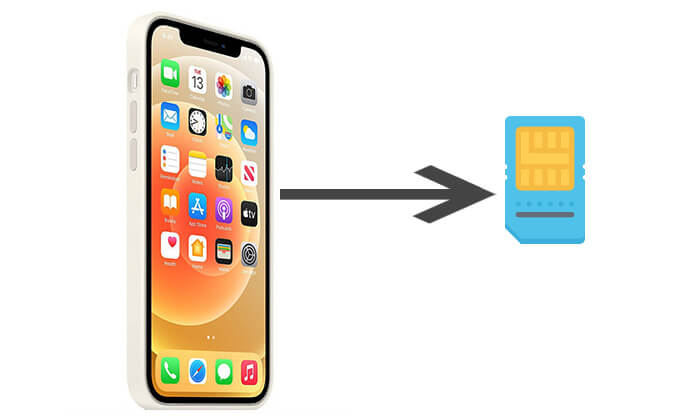
Removing the SIM card from an iPhone will affect cellular services, but it will not erase the data stored on your device. Here are the main things that happen:
1. Personal Data Remains Safe
Removing the SIM card does not delete photos, videos, apps, contacts, or other personal data stored on your iPhone. However, if some contacts or information are saved on the SIM card, make sure to transfer or back them up before removing it. (How to back up iPhone contacts?)
2. Loss of Cellular Connectivity
Without a SIM card, your iPhone will lose access to cellular services, including regular phone calls, SMS/MMS messages, and mobile data. You can still use WiFi-based features such as iMessage, FaceTime, and online apps when connected to Wi-Fi.
3. No Network Signal
After removing the SIM card, the iPhone may show "No Service" or "Searching" where the network signal usually appears.
4. Carrier Services Become Unavailable
Features provided by your carrier, such as voicemail and some SMS/MMS services, may not be available until you insert a SIM card or activate another cellular plan.
5. Internet-Based Apps Need Wi-Fi
Apps that require an internet connection may not work properly unless your iPhone is connected to Wi-Fi or another available network.
6. Emergency Calls May Still Be Available
In many regions, iPhones may still support emergency calls without a SIM card when a compatible network is available. (iPhone Says No SIM Card Installed?)
If you are ready to remove the SIM card, follow the steps below to safely take it out of your iPhone.
Removing a SIM card from an iPhone is a simple process that only takes a few minutes. Before you begin, prepare a SIM ejector tool. If you don't have one, you can also use a small paper clip as an alternative.
While you can remove the SIM card while the iPhone is on, it is recommended to turn off the iPhone first to prevent network glitches or misread cards.
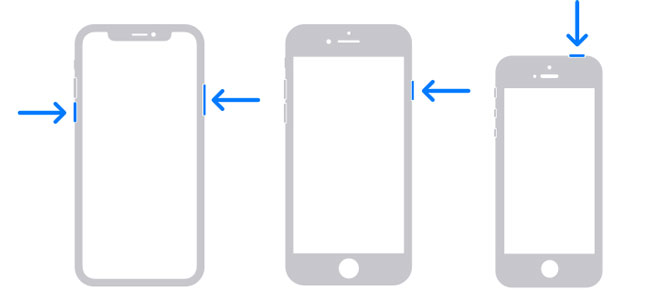
1. To turn off your iPhone, follow these steps:
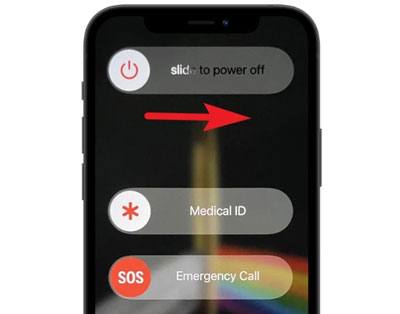
2. Slide the slider, then wait 30 seconds for your device to power off.
The location of the SIM card tray depends on your iPhone model. Look for a small tray with a pinhole on the side or top of your device.
SIM card tray located on the left side:
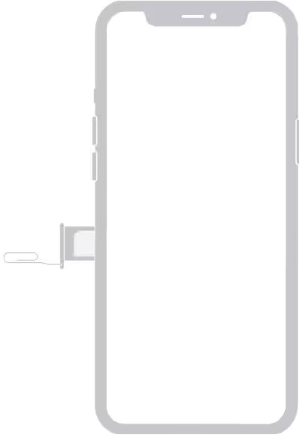
SIM card tray located on the right side:
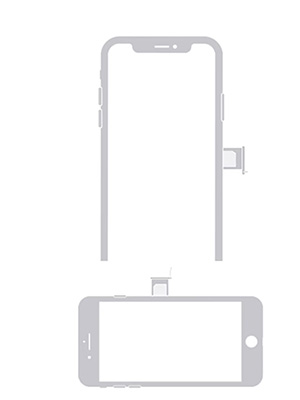
SIM card tray located on the top:

Note: Some iPhone models do not have a physical SIM tray. For example, iPhone 14 and newer models sold in the United States use eSIM technology instead of a traditional SIM card. These devices allow you to activate and manage cellular plans digitally without inserting a physical SIM card.
Once you locate the SIM card tray, insert the SIM ejector tool into the small hole next to the tray.
Press gently until the SIM tray pops out. Avoid using too much force, as this may damage the SIM tray or your iPhone.
If you don't have a SIM ejector tool, you can use a straightened paper clip instead. Insert one end of the paper clip into the hole and gently press until the tray opens.
After the tray pops out, carefully pull it out of the iPhone. Hold the tray steadily to prevent the SIM card from falling out.
Take the SIM card out of the tray carefully.
Then, gently push the SIM tray back into the iPhone until it is fully inserted.
After removing or replacing the SIM card, turn on your iPhone (if it was turned off) and check the status bar.
If you inserted a new SIM card, your iPhone should connect to the carrier network automatically. If you see "No Service" or "Searching", check whether the SIM card is installed correctly or contact your carrier for assistance.
If you cannot find the SIM ejector tool, you can use a small paper clip to remove the SIM card:
Other thin objects, such as an earring pin, may also work. However, avoid using sharp or thick objects that could scratch your iPhone or damage the SIM tray.
Now that you know how to remove a SIM card from your iPhone, there are a few things you should know before taking it out:
1. Back Up Important Data Before Switching SIM Cards
Removing a SIM card will not delete photos, messages, apps, or other data stored on your iPhone. However, if you are changing phones or preparing to sell your device, it is a good idea to back up important data beforehand. Tools like Coolmuster iOS Assistant can help you back up contacts, messages, photos, and other iPhone data quickly and securely.
2. Check Whether Your iPhone Uses a Physical SIM or eSIM
Some newer iPhone models, especially those sold in the United States, use eSIM technology instead of a physical SIM card. If your iPhone does not have a SIM tray, you can manage your cellular plan from Settings without removing a physical SIM card.
3. Handle the SIM Tray Carefully
When removing the SIM card, avoid using excessive force or inserting unsuitable objects into the SIM tray hole. Keep the SIM card and tray in a safe place if you plan to use them again.
4. Keep Your Carrier Information in Mind
After removing a SIM card, your iPhone may lose access to cellular services, including calls, SMS/MMS, and mobile data. Make sure you have another SIM card or an active eSIM plan if you need cellular connectivity.
If you are planning to sell, trade in, or give away your iPhone, removing the SIM card is not enough to protect your privacy. Your personal data, including photos, contacts, messages, accounts, and other files, may still remain on the device. Therefore, you should erase all content and settings from your iPhone before handing it over.
Coolmuster iOS Eraser is a professional iPhone data erasure tool that helps permanently remove personal information from your device. It supports various iPhone models and iOS versions, allowing you to delete photos, contacts, messages, and other private data with a few simple clicks. With multiple security levels available, it helps prevent your erased data from being easily recovered.
How to Erase Everything from iPhone with Coolmuster iOS Eraser:
01Download and install Coolmuster iOS Eraser on your computer. Launch the program and connect your iPhone using a USB cable. Once your device is detected, the main interface will appear.
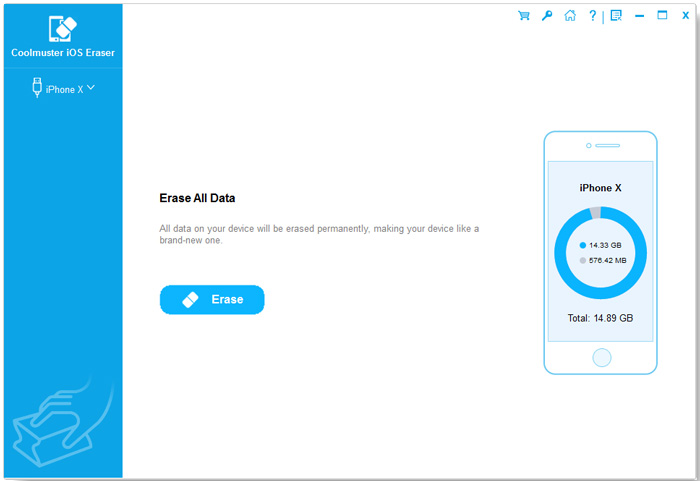
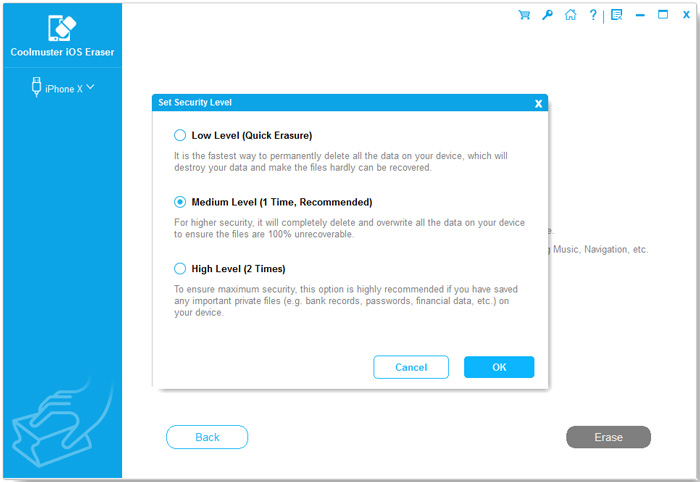
02Click the "Erase" button on the main interface. Select your preferred security level from Low, Medium, or High, then click "OK" to confirm.
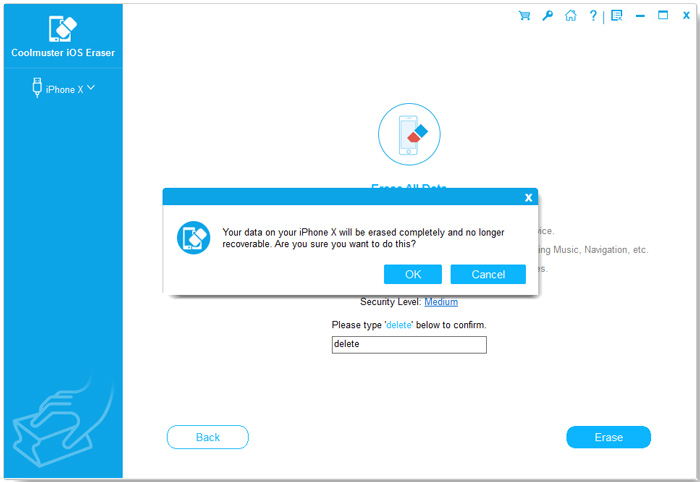
03Enter "delete" in the confirmation box and click "Erase" again. Confirm your choice when prompted to start wiping your iPhone data.
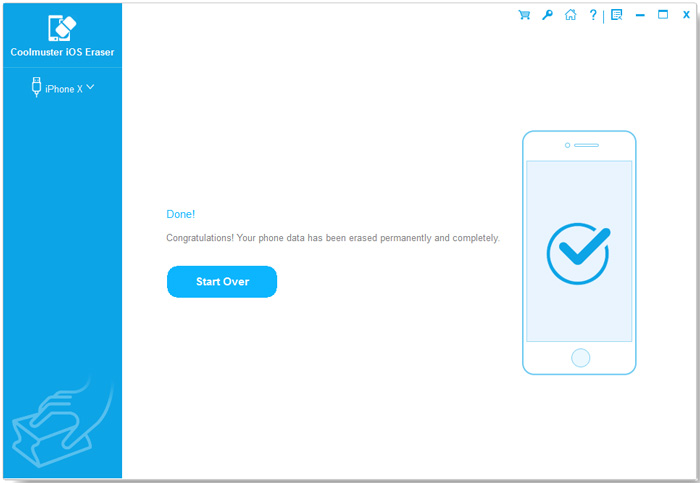
04The program will begin scanning and erasing all selected data from your iPhone. Once finished, your personal information will be removed, and you can set up the device as new or prepare it for the next owner.
Video Tutorial:
Q1. Why won't the SIM card tray eject?
If the SIM card tray won't eject, it may be because the SIM ejector tool is not inserted correctly or you are not applying enough pressure. Make sure the tool is inserted into the small hole next to the SIM tray, then gently press until the tray pops out.
If the SIM tray still does not open after several attempts, avoid forcing it, as this may damage the tray or your iPhone. You can remove the phone case that may be blocking access or contact Apple Support for further assistance.
Q2. What should I do if the SIM card tray is stuck or damaged?
If the SIM card tray is stuck inside your iPhone, do not try to pull it out forcefully with sharp objects, as this may cause additional damage. First, check whether the ejector tool is inserted into the correct hole and try opening the tray again with gentle pressure.
If the tray is bent, broken, or still cannot be removed, it is recommended to seek help from Apple Support or an authorized repair service instead of attempting to fix it yourself. (SIM card stuck in iPhone?)
Q3. Will removing the SIM card delete my data on the iPhone?
No. Removing the SIM card will not delete photos, videos, apps, messages, or other personal data stored on your iPhone.
A SIM card is mainly used to connect your iPhone to your carrier network. It does not store most of the data on your device. However, if you have important contacts or information saved on an old SIM card, make sure to transfer or back up them before removing or replacing it.
Q4. Will my iPhone's functionality be limited after changing the SIM card?
Changing or removing the SIM card mainly affects cellular services. After inserting a new SIM card, your iPhone will use the new phone number and carrier plan.
Your other features, such as apps, photos, Bluetooth, and Wi-Fi connectivity, will continue to work normally. However, some services that depend on the previous carrier, such as mobile data, calls, and SMS/MMS, may change based on your new SIM card or cellular plan.
Q5. Can I remove the SIM card while my iPhone is on?
Yes. You can remove the SIM card while your iPhone is powered on, and doing so will not delete your data or damage the device. However, it is recommended to avoid using cellular services during the process and handle the SIM tray carefully.
If you are replacing the SIM card, wait a moment after inserting the new card so your iPhone can reconnect to the carrier network.
Q6. How do I remove a SIM card from iPhone without a tool?
If you do not have a SIM ejector tool, you can use a small paper clip instead.
Straighten one end of the paper clip, insert it into the small hole next to the SIM tray, and gently press until the tray pops out. You can also use other thin objects, such as an earring pin, but avoid using sharp or thick items that may damage the SIM tray.
Q7. Does every iPhone have a SIM card?
No. Not every iPhone uses a physical SIM card.
Many newer iPhone models, especially those sold in the United States, use eSIM technology instead of a traditional SIM card. For example, iPhone 14 and later models in the US do not have a physical SIM tray. These devices allow users to activate and manage cellular plans digitally through the iPhone settings.
Q8. Do I need to remove the SIM card before selling my iPhone?
Yes, removing the SIM card before selling or giving away your iPhone is recommended, especially if you use a physical SIM card. This prevents the next owner from accessing your cellular plan or phone number.
However, removing the SIM card alone is not enough to protect your privacy. Before selling your iPhone, you should also back up important data, sign out of your Apple ID, turn off Find My iPhone, and erase all content and settings from the device. (See the guide: How to Erase iPhone Before Selling It.)
By now, you should know how to remove a SIM card from an iPhone safely. The process is simple: locate the SIM tray, use a SIM ejector tool, and carefully remove the SIM card. As long as you use the correct tools and avoid applying excessive force, you can complete the process without any problems.
Keep in mind that removing the SIM card only disconnects your iPhone from cellular services and does not erase your personal data. If you plan to sell, trade in, or give away your iPhone, you should also erase all content and settings to protect your privacy.
For a more secure data removal process, Coolmuster iOS Eraser is a useful tool that helps permanently erase photos, contacts, messages, and other private information from your iPhone, reducing the risk of unauthorized data recovery.
Related Articles:
SIM Not Supported on iPhone? Here's the Fix
[Full Guide] How to Recover SIM Card Data from iPhone?
How to Transfer SIM Card to New iPhone? Solved in 1 Minute!
Switching SIM Cards Between iPhones [Full & Comprehensive Guide]







 Free Download for PC
  Free Download for Mac


