"I have a non-jailbroken iPhone with iOS 10 and a Gmail account. When I found the email caches took up so much space on my iPhone memory, I tried to clear the email cache by deleting my email account. When I log into my email account again, it turns out that the email caches still occupy much storage on my iPhone without being removed along with the email account. How can I clear email caches on iPhone to free up iPhone space?"
As a cellphone operating system that is not prone to running slowly, iOS offers a good user experience in usual conditions. However, it is inevitable that an iPhone/iPad will produce lots of junk files or cache files, such as email caches, which might take up more and more storage space on your iPhone or iPad.
In order to free up storage space on the iPhone and speed it up the iPhone, it is necessary to clear email caches on the iPhone. But how to delete email caches from iPhone completely and effectively? This article offers you 4 methods for your reference.
To completely and permanently clear email caches on iPhone, it is highly recommended to rely on a professional cleaning tool like Coolmuster iOS Cleaner. It enables you to completely and permanently delete email caches on iPhone/iPad/iPod without uninstalling the Mail app within a few simple steps.
Furthermore, apart from mail cache files, this iOS Cleaner also supports removing other junk files from iPhone/iPad/iPod, including app caches, app cookies, app temp files, app crash logs, downloaded temp files, photo caches, user storage files, iTunes radio history, etc. This program can automatically scan the junk files on your device and show them in different categories. You can choose the unwanted junk types for cleaning according to your needs.
Main features of Coolmuster iOS Cleaner:
Below are the free trials of this program. Please download the tool on your computer and start to easily clear email caches on your iPhone with the following user guide.
Steps to clear Mail caches on iPhone completely:
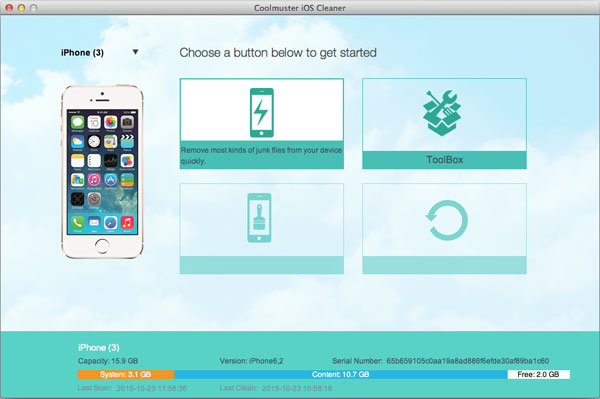
01Please launch the tool on your computer after downloading and installing it, then get a USB cable to connect your iPhone to the computer. Thus, the program will automatically recognize the connected iPhone soon and show the interface with your iPhone information and available cleaning modes as below.
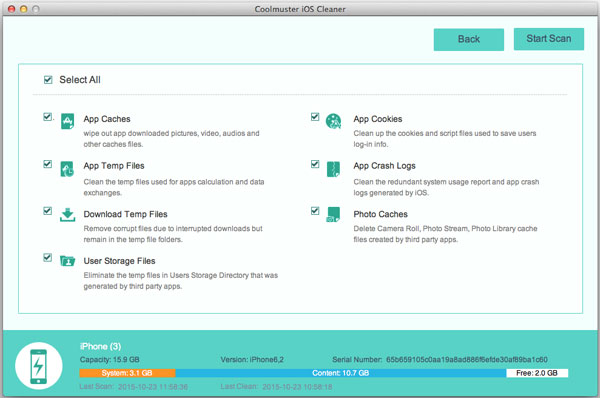
02To remove email caches from iPhone, please select the first mode on the main interface to get started. On the next screen, please check the "App Caches" option and other junk file types that you want to clear, and hit the "Start Scan" button to scan your iPhone for details.
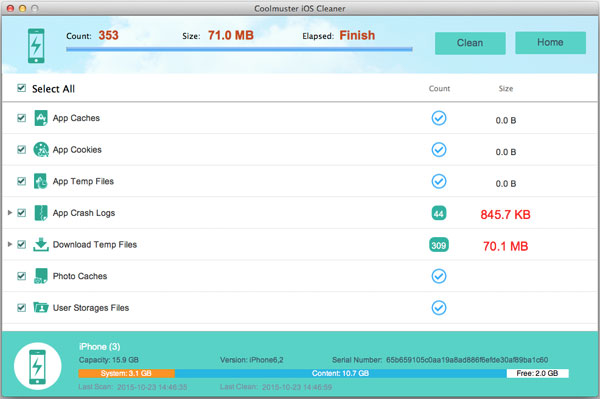
03After quick scanning, you might see the scan result with the size of different junk types that take up your iPhone memory, showing in different categories. To clear email caches, simply tick off the "App Caches" option and other unwanted file types, or directly check the "Select All" option at the top, and hit the "Clean" button to delete mail cache files from iPhone completely and permanently right away.
Another effective way to remove email caches is by deleting your email account and then re-adding it. When you remove an account, iOS automatically clears all associated cached data, including temporary mail storage, attachments, and synced messages.
Here is how to delete email caches on iPhone:
Step 1. Open the Settings app on your iPhone.
Step 2. Scroll down and tap "Mail" > "Accounts".
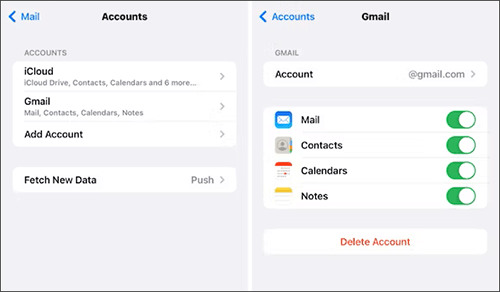
Step 3. Choose the email account you want to remove.
Step 4. Tap "Delete Account", then confirm your action.
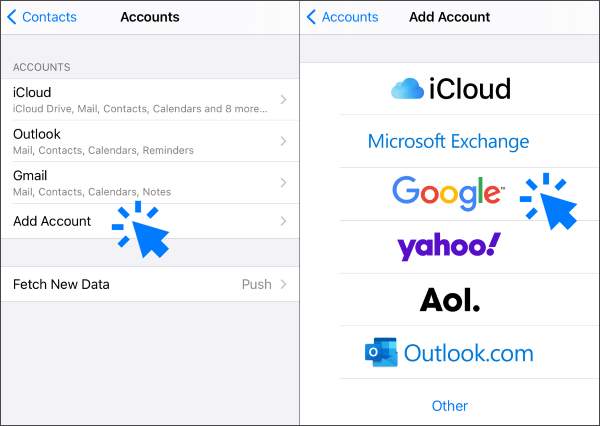
Step 5. Return to "Settings" > "Mail" > "Accounts", and tap "Add Account" to re-add your email profile.
Uninstalling and reinstalling the Mail app is also an optional method to clear email caches and free up space on your iPhone. It is easy and, of course, it can recover mail storage on iPhone, though this only removes parts of email caches from the Mail app or iPhone after verification. Also, for the Mail app that is built into the iPhone, it is not allowed to delete the Mail app that comes with the iPhone unless your iPhone has been jailbroken. So, please make your choice according to your reality.
Steps to uninstall and reinstall the Mail app to clear iPhone email caches:
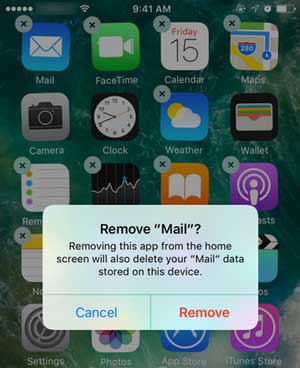
Step 1. On the iPhone Home screen, please find the Mail app. Then press and hold the Mail app for a while till the "X" icon appears on the screen. Simply tap on it to delete the Mail app from your iPhone. (Can't delete the app on your iPhone?)
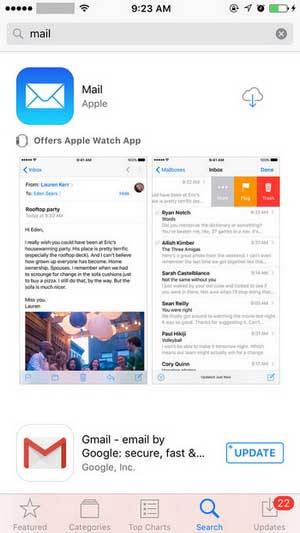
Step 2. Please open App Store on your iPhone, tap the Search bar, and type "mail" to search, download, and install the Mail app on your iPhone.
Step 3. Then you might open the Mail app from the Home screen and sign in to your mail account with your email address and password. Then you can check your sent and received emails in the mailbox now without much email cache.
The final solution is to restore the iPhone to default factory settings, which will completely erase all data and settings on your iPhone, including the undeletable email caches on your iPhone.
Note: To avoid unexpected data loss, please be sure that you have backed up your iPhone data before restoring it to factory settings.
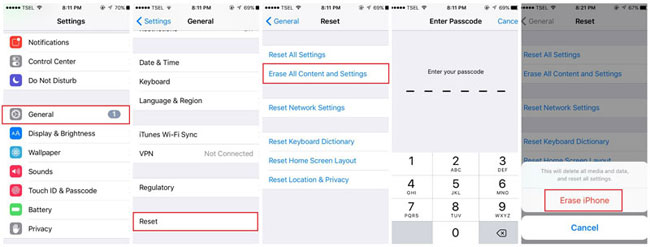
Steps to restore iPhone to clear Mail caches on iPhone:
Step 1. Unlock your iPhone and launch the Settings app.
Step 2. Tap the "General" option from the Settings page to preview more options.
Step 3. Then tap "Reset" > "Erase All Content and Settings" option to move on.
Step 4. Then you are required to enter your password to confirm your identification, and then tap the "Erase iPhone" option from the pop-up window to start restoring the iPhone to factory settings. (iPhone won't erase?)
Although email caches are small, they can take up a significant amount of storage over time, impacting system performance. The methods discussed in this article are all effective at clearing these files, but if you're looking for a quick, safe, and hassle-free way to clean email caches on your iPhone, we highly recommend using Coolmuster iOS Cleaner.
It not only removes email caches but also optimizes your iPhone comprehensively, freeing up more available space and ensuring smoother device performance.
Related Articles:
How to Fix the iPhone Storage Full Problem with 5 Useful Tips
How to Clear Storage on iPhone 17/17 Pro: Tips and Tricks
How to Free Up Storage on iPhone Without Deleting Anything? - 8 Solutions
How to Delete Documents and Data on iPhone/iPad [Verified Tips]


 Free Download for Mac

 Download for PC
