There may come a time when you want to declutter your Android device by permanently deleting certain photos. It could be because you either want a fresh start or intend to sell the phones to another person, and you do not want a third party to access your pictures.
Whatever the reason is, there are various methods of having those snaps gone. This article is about to show you how to delete photos from Android phones permanently, which helps you a lot to protect your privacy from leakage.
How do you permanently delete photos so that they cannot be recovered? The first method of erasing all the data from your Android device is using Coolmuster Android Eraser. The advantage of using this method is that with just one click, all the memories are permanently gone, including all photos from your Android phone. It means that it will not be possible to restore the files back once the delete process is over, even by using recovery tools.
It is fully compatible with almost all Android phones and tablets, such as Samsung (Samsung Galaxy S25 Ultra included), Xiaomi, OPPO, OnePlus, TECNO, Infinix, Itel, vivo, Motorola, Honor, etc.
Highlights of Coolmuster Android Eraser:
The following are the steps one has to follow when using this Coolmuster Android Eraser:
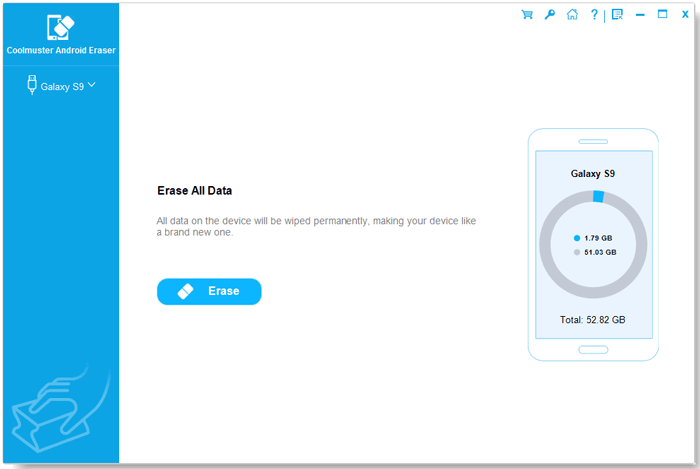
01In the first step, ensure that the phone has been detected by the program. This can only be done by connecting the device to the personal computer. A USB cable can be used to create this connection. Alternatively, the user can also link the two by using Wi-Fi.
Download the Coolmuster Android Eraser and install it in your computer.
02After connection, you can click the "Erase" button to start to delete photos from Android.
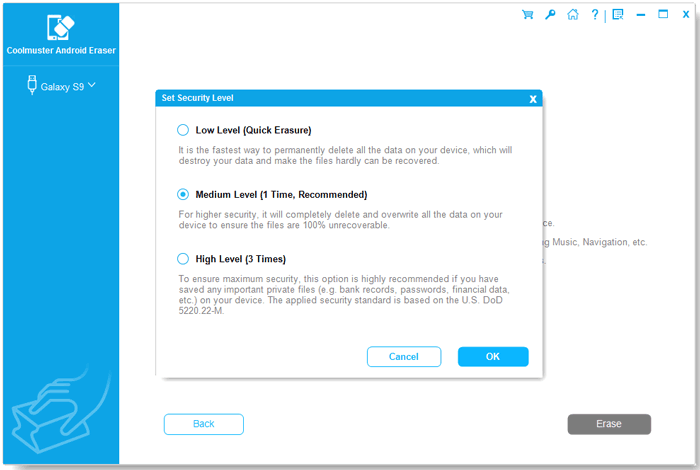
03Right beside the Security level, there is a menu. Click on it to select either the Low, Medium, or High-security level. Click "OK" to confirm your choice.
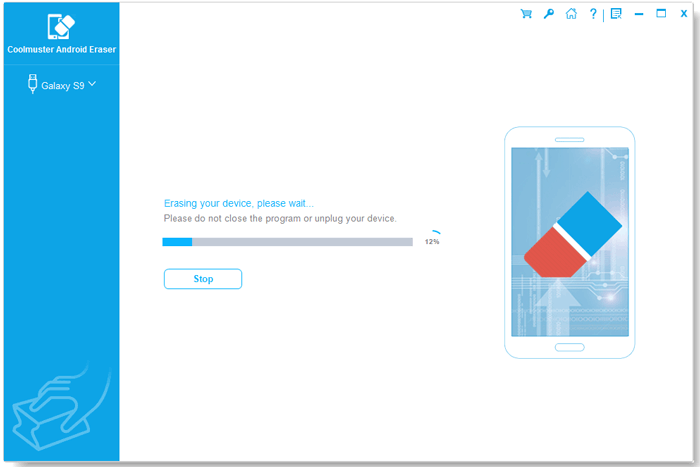
04To start deleting all the files, including the shots, type the word "delete" in the space and then tick on the "Erase" button on the interface. The program will carry out a quick scan, clear all the files, and immediately overwrite the data. Always ensure that you do not interfere with the connection before the delete process is over.
Here's the video guide (2 minutes and 34 seconds):
If you want to delete photos from Android phone selectively, or delete photos from Android Gallery, you can also rely on the Coolmuster Android Assistant, which helps you better manage (delete/export/add) photos on any Android phone. Not only does it handle photo management, but it also manages various files like contacts, messages, videos, and music.
Moreover, it facilitates one-click backup and restoration of all data on your Android phone and supports seamless data transfer between Android phones and computers. For a comprehensive solution, Coolmuster Android Assistant stands out as your premier option.
Try this tool below.
01Upon accessing Coolmuster Android Assistant, you may encounter the interface depicted below. Ensure that your Android phone is securely connected to your computer via a USB cable or Wi-Fi.
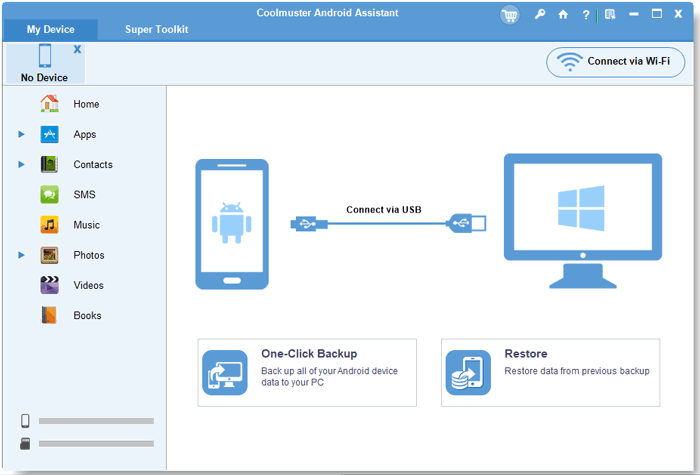
02Proceed by clicking on the "Photos" category, which will display all the pictures stored on your Android phone. Select the photos you wish to delete, then click on the "Delete" option located at the top.

You can watch the video guide here (about 2 minutes long):
Note: You can check how to mass delete photos from Android phone here.
Our devices often store a plethora of personal information, including photos that we might want to delete permanently. If you're an Android user wondering how to securely erase your photos, one effective method is performing a factory reset. This process not only wipes your device clean of data but also ensures that your photos are irreversibly removed.
In this section, we'll walk you through the steps to achieve this.
Step 1. Go to the "Settings" app on your Android device. The location may vary slightly depending on your device's manufacturer and Android version, but it is typically represented by a gear icon.
Step 2. Within the Settings menu, find and select either "System" or "General Management," depending on your device.
Step 3. Look for an option like "Reset" or "Reset Options." The exact wording might differ, but it generally involves the term "Reset."
Step 4. Inside the Reset menu, you should find an option named "Factory data reset" or something similar. Tap on it to initiate the process.
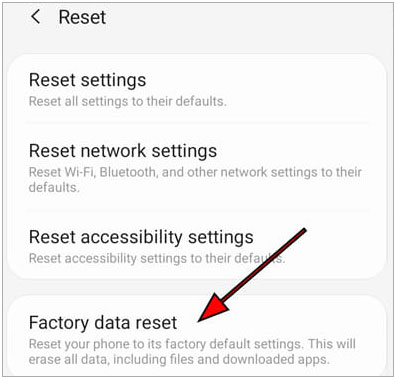
Step 5. You will likely be prompted to confirm the Factory Reset. Be aware that this action will erase all data on your device, including photos, apps, and settings.
Step 6. If your device is protected by a PIN, password, or pattern, you will need to enter it to proceed with the Factory Reset.
Step 7. Once you've entered your PIN or password, you'll be asked to confirm your decision to perform a Factory Reset. Confirm, and the process will begin.
Note: Performing a Factory Reset is an effective way to permanently delete photos from your Android device. However, exercise caution, as this process erases all data. Make sure to back up any important information before proceeding.
Smartphone users can also selectively remove pictures from their photo gallery. You can follow these steps to do it:
Step 1. Open the Gallery app (or Photos App), and you will find the list of all your files and folders.
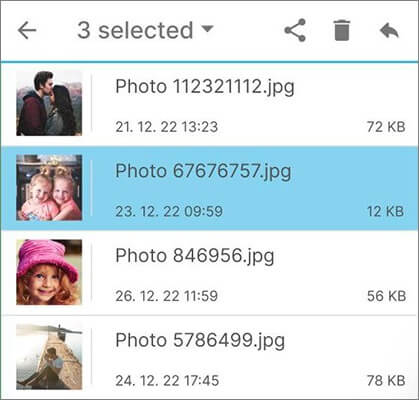
Step 2. On the Gallery app, tap the snapshots that you want to remove.
Step 3. Click on the "Trash can" button to delete photos from the Android gallery. Then confirm your choice if asked.
Step 4. To permanently delete the photos, you need to access the trash or bin where the deleted items are stored temporarily. This option is usually available in the Photos app or your device's file manager.
Step 5. Once inside the trash or bin, review the items to ensure that only the intended photos are present. Then, look for an option to "Empty Trash" or "Permanently Delete." Tap this option to permanently remove the selected photos from your device.
If your device doesn't have a built-in option to empty the trash, consider using a file explorer app. Navigate to the trash or recycle bin folder and delete the photos from there. This step ensures that the photos are not only removed from the app but also from the device's storage.
Explained above are some of the methods that you could apply to clear those memories from your Android device. Choose the procedure that is most appropriate for your device. However, among so many methods, we recommend using Coolmuster Android Eraser the most because it can delete pictures on your phone thoroughly and permanently.
Related Articles:
How to Delete Photos from Samsung Galaxy Permanently - 3 Ways!
8 Best Android Data Eraser Software: Erase Your Android Permanently
Get the Best Photo Manager for Android | A List Contains 8 Options
Back Up Photos for Android: Top 8 Straight-to-the-Point Methods


 Free Download for PC
  Free Download for Mac

