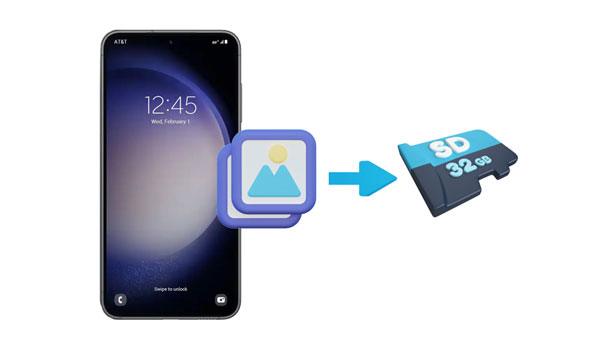
Does your Android phone have insufficient memory due to the high-definition photos stored on it? If so, an SD card is a perfect way to keep these photos and free up space. Wondering how to move pictures to an SD card Android? It is a simple and straightforward process. We have some great solutions that will help make transferring content from internal storage to the newly installed card easy. Keep reading.
Below are some universal reasons why you may need to move files to an SD card on Android:
1. Free Up Some Space
Due to the high-definition images and videos, you may need to free up some internal storage space on your Android phone. This is when an SD card comes in handy. Moving files onto the SD card helps create more room for new content, so you won't have to worry about running out of internal memory whenever you want to snap a photo.
2. Keep Files Securely Stored
Storing your images and videos on an SD card ensures that they're not only easily accessible but also securely stored. Having them in one place makes it easier to keep track of them and ensure your content is backed up in case anything were to happen to your device.
3. Transfer Files Easily Between Devices
With an SD card, transferring files between devices becomes incredibly easy and efficient, from your Android device to a PC or Mac computer and other phones. The process is smooth, fast, and free of stress.
4. Improve the Speed of Android Phone
After moving files to the SD card, you may find that your Android phone has improved speed and overall performance. This is because it will no longer be weighed down with bulky images and videos stored in its internal memory.
Knowing how to move pictures to an SD card in Android phones is easy. However, there are some things that you should do before you transfer your photos to an SD card:
Here are 4 popular and safe approaches to transfer your pictures to a micro SD card, depending on how you'd like to do it:
The Gallery app is a great way to transfer photos from your phone's internal storage to an SD card. Follow the below steps:
Step 1: Launch the Gallery Application
If you're trying to access your Gallery, look for the icon that resembles a photograph or stack of photographs on your Home screen. Tap it, and the Gallery will open up.
Step 2: Open the Album
Are you looking for photos taken with your camera? They are usually stored in the Camera folder. If it's an image downloaded from the web, check out your Downloads folder. Additionally, pictures linked to a specific app will be found within its designated file directory. Tap on that corresponding folder and explore what lies inside.
Step 3: Select All the Photos You Wish to Move
To easily move photos to your SD card, simply tap the desired pictures. You'll then recognize a checkmark in the top-left corner of said images.
Step 4: Move Your Pictures to Your SD Card
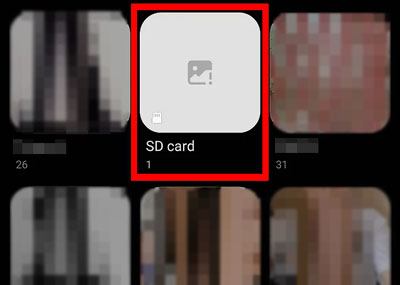
You'll find a button with three vertical dots in the upper-right corner. Clicking it reveals an array of diverse options in a drop-down menu. Choose the option named "Move to Album" from the drop-down menu that appears.
Easily locate the albums stored on your SD card by looking for a small icon resembling an SD card in the bottom-left corner of its thumbnail. Then, simply tap the album you wish to transfer photos into, and this will move all chosen pictures immediately.
The process is straightforward for Android users looking to transfer photos from their phone to an SD card using a file manager. No matter the brand or model of your device, this step-by-step guide provides a simple solution:
Step 1: Open the File Manager Application
Go to My Files or Files Manager. If you can't find one already installed on your device, don't worry. With a few clicks of a button from Google Play Store, you'll quickly access all the information stored on your phone without any trouble.
Step 2: Select Your Desired Photos
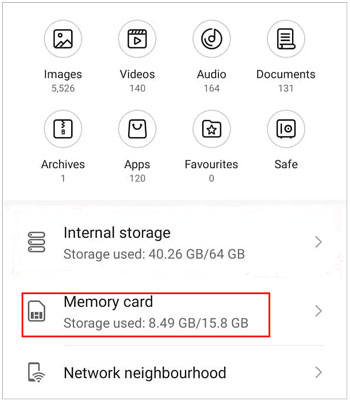
When transferring photos from your internal memory to an SD card, open the folder that houses them. Depending on your device, it could be DCIM, Gallery, or Captures, and then select all the images you'd like to move through a long press. Your pictures are now ready for transfer.
Step 3: Paste the Pictures to Your SD Card
Select the pictures you want to move, and click the More icon. Then tap the Copy or Move icon, and go to the Memory card. At last, click the Paste icon. Your images will be transferred to the micro SD card.
Note:If you are an Apple user, you can export photos from your iPhone to an external hard drive in these practical ways.
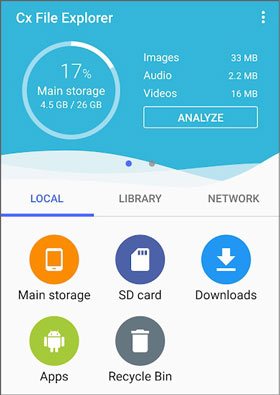
Cx File Explorer is a useful file manager for Android devices. It can detect and scan the files stored in internal and external memory. Thus, you can use it to transfer photos from Android to the SD card.
Step 1: Install Cx File Explorer on Your Phone
You can download the Cx File Explorer app from the Google Play Store. When it's downloaded and installed, open it up to begin transferring photos from your phone to an SD card.
Step 2: Launch Cx File Explorer
When you open Cx File Explorer for the first time, two pop-up alerts may appear asking if you'd like to grant access to your internal storage and SD card. To benefit from all of Cx File Explorer's features, tap Allow in both prompts. This way, it can explore your internal storage and SD card.
Step 3: Find Your Photos
Spot the bright orange icon with a phone illustration. Tap it, and you're on your way to opening up internal storage in no time. Then, locate your images and opt for those you want to move.
Step 4: Move to Your Memory Card
After selecting pics, please choose your SD card folder and paste the pictures to it. Once done, you can view your photos from your SD card.
Coolmuster Android Assistant, a trusted and professional Android data transfer program, is an efficient way to move pictures from an Android device to an external memory drives and cards, especially when you plan to move lots of images. On the one hand, you can transfer all photos from your Android phone to the external memory at once; on the other hand, it also allows you to view, select, and copy specific images to the micro memory card.
More importantly, this software is not only good at moving photos but also transferring videos, songs, apps, SMS, contacts, etc., from Android to a computer or other external drive.
Coolmuster Android Assistant Key Features:
Download this software to move your photos.
How do I move my photos to my SD card? Here's the guide:
01Install Android Assistant
After installing the app on your computer, launch it, and you will see the initial interface.
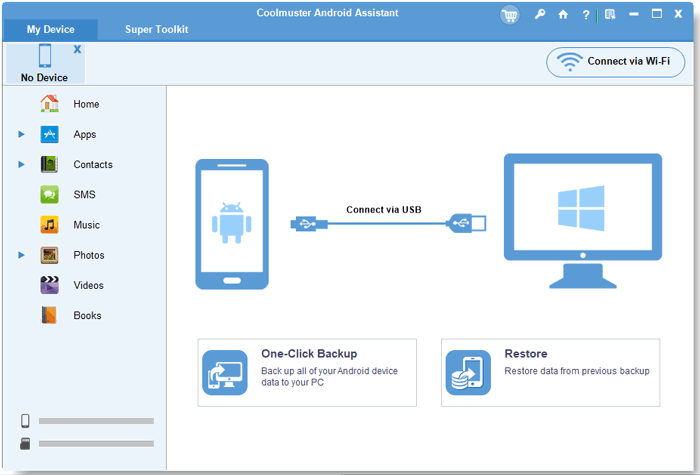
02Connect Your Phone to the Computer
To get started, simply connect your Android device to the PC using a USB cord. If your SD card is not on your phone, you need to plug your SD card into the PC with a card reader. Be sure to enable USB debugging on your phone as well before proceeding. Once you do so, this program will recognize both devices immediately.
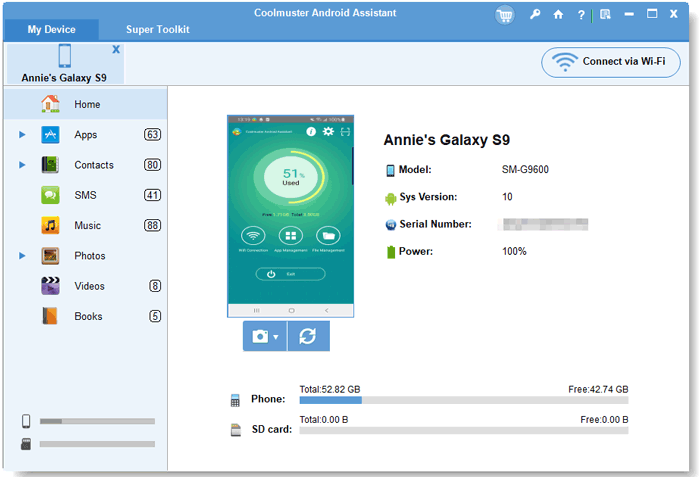
03Move the Files from Your Phone to Your SD Card
To transfer photos, first select the Photos category in the left window. Check off their thumbnails to preview them. Then, click Export on the top menu and choose your memory card to store your images. Once done, the software will copy the pics to the card immediately.

Now, you understand how to move pics from internal storage to an sd card. The methods discussed in this article enable you to quickly and easily transfer your favorite photos from an Android device to an SD card. Coolmuster Android Assistant software is the most effective and secure way to move pictures from an Android device to an external memory card. So, why wait? Download it and start moving your photos in an instant.
Related Articles:
Android Backup to SD Card: How to Back Up Android Phone/Tablet to SD Card
How to Move Videos to SD Card | Streamline Android Storage
A Comprehensive Tutorial on How to Move WhatsApp to SD Card
How to Realize SD Card Recovery for Android [Must Read in 2026]


 Free Download for PC
  Free Download for Mac

 Download for PC
 Download for Mac
