While Apple provides iCloud as a convenient cloud storage solution for keeping your data synced across devices, many users still prefer iTunes local backup for its flexibility and personalization. However, iTunes backup and restore processes are not always smooth, and users may encounter various issues during use.
In this article, we have compiled some of the most frequently asked questions and common problems related to iTunes backup and restore, helping iOS users troubleshoot and resolve them more easily.
Sometimes, when you try to back up your iPhone using iTunes, you may see error messages such as "iTunes could not back up the iPhone because the backup could not be saved on the computer" or a session failure notification. In most cases, this means the backup process has been interrupted or the backup file cannot be properly stored on your computer.
Here are some effective solutions to fix this issue:
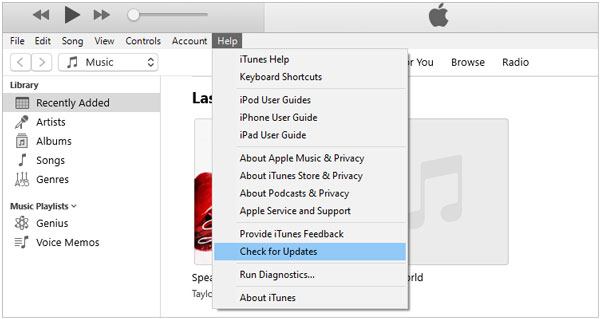
Fix 1: Update iTunes to the Latest Version
Make sure you are using the latest version of iTunes. An outdated version may cause compatibility issues and backup failures. Update iTunes and try the backup process again.
Fix 2: Check Existing Backup Files
In some cases, iTunes may have already created a partial or renamed backup file (for example, with "-OLDBACKUP" at the end). You can check whether the backup already exists in the default location:
Windows 7/8/10/11: C:\Users\USERNAME\AppData\Roaming\Apple Computer\MobileSync\Backup\
If the backup is already there, you may not need to create it again.
Fix 3: Try an iTunes Alternative Backup Tool
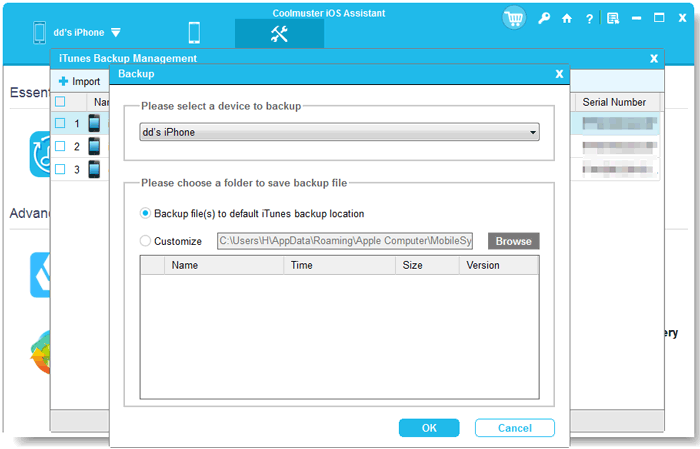
If the issue persists, you may consider using a third-party tool to back up your iPhone more easily. For example, tools like Coolmuster iOS Assistant allow you to transfer and back up iPhone data to your computer without relying on iTunes. It supports photos, videos, contacts, messages, and more, and provides a simpler backup process with just a few clicks.
It also offers a one-click backup feature that makes the process simple and fast. Follow these steps:
Launch the software and connect your iPhone to the computer via a USB cable.
Go to "Super Toolkit" from the top menu.
Click "iTunes Backup & Restore".
Select "Backup" to start the one-click backup process.
Choose a location on your computer and wait for the backup to complete.
With this method, you can easily back up photos, videos, contacts, messages, and other important data without worrying about iTunes errors or compatibility issues.
Video Guide:
2. Backup File Couldn't Be Saved on Your PC
If iTunes displays a message saying that the backup could not be saved on your computer, the issue is usually related to insufficient permissions, security software interference, corrupted backup files, or problems with the backup folder.
Try the following solutions:
Restart your devices. Restart both your iPhone/iPad and computer, then try creating the backup again.
Update iTunes. Make sure you are using the latest version of iTunes, as outdated versions may cause backup errors.
Check your security software. Antivirus programs, firewalls, or other security tools can sometimes block iTunes from writing backup files. Temporarily disable them and test the backup again.
Reset the Lockdown folder. A corrupted Lockdown folder may prevent proper communication between iTunes and your iOS device. Resetting it can often resolve backup-related issues.
Rename or remove old backup files. Existing backup files with conflicting names may prevent new backups from being created. Locate the backup folder and rename or delete the old backup if necessary:
Windows: C:\Users\USERNAME\AppData\Roaming\Apple Computer\MobileSync\Backup\
Mac: ~/Library/Application Support/MobileSync/Backup/
After completing these steps, reconnect your device and try backing it up again.
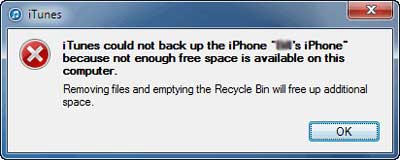
3. Not Enough Free Space Available
If you see an error indicating that there is not enough free space available, it usually means your computer or iPhone does not have sufficient storage to complete the backup process. Here are some effective solutions you can try:
Check available storage on your computer. Start with the basics and make sure your PC or Mac has enough free disk space to store the iTunes backup file.
Restart your devices. Restart both your iPhone and computer, then try the backup process again.
Try a different USB cable or port. A faulty or unstable connection may interrupt the backup process. Switching the cable or USB port can sometimes solve the issue.
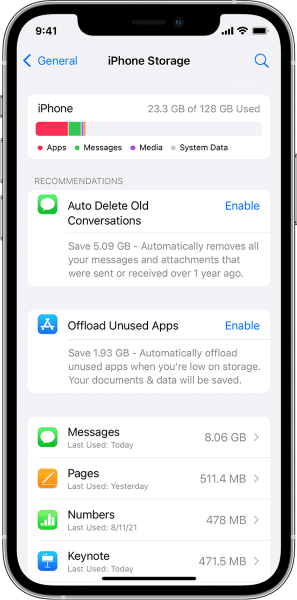
Free up storage on your iPhone. If your iPhone storage is nearly full, delete unnecessary files or apps to reduce system load and try again.
Use an alternative backup method. If the problem persists, you can consider creating an iCloud backup instead, or use a local backup tool to avoid storage limitations on iTunes.
4. iTunes Does Not Recognize Your iPhone, iPad, or iPod
If your iPhone, iPad, or iPod is detected by the computer but does not appear in iTunes, the issue is usually caused by connection problems, missing drivers, or issues with Apple system services.
Try the following solutions:
1. Check the USB connection
Use a different USB cable or USB port to ensure a stable connection. Avoid using USB hubs if possible.
2. Trust the computer
Unlock your iPhone and check for a "Trust This Computer" prompt. Tap Trust to allow communication between your device and iTunes.
3. Restart Apple Mobile Device Service (Windows)
Press Windows + R, type services.msc, and press Enter.
Find Apple Mobile Device Service in the list.
Right-click it and choose Restart (or Start if it is stopped).
Reopen iTunes and reconnect your device.
4. Reinstall Apple Mobile Device USB Driver
Right-click the Start menu and open Device Manager.
Expand Universal Serial Bus Controllers.
Locate Apple Mobile Device USB Driver.
Right-click it and select Uninstall device.
Restart your computer and reconnect your iPhone. Windows will reinstall the driver automatically.
5. Update or reinstall iTunes
Make sure you are using the latest version of iTunes. If the issue persists, uninstall and reinstall iTunes to repair missing or corrupted components.
Additional tips
Restart both your computer and iPhone/iPad/iPod.
Try a different USB cable.
Ensure your device is unlocked during connection.
After applying these steps, iTunes should be able to recognize your device normally.
5. iTunes and Security Software Conflicts
In some cases, iTunes may fail to launch properly or your device may not be detected due to conflicts with security software such as antivirus programs or firewall settings. These security tools can sometimes block iTunes processes or restrict device communication. To fix the problem between iTunes and security software, try the following solutions:
Check system date and time. Make sure your computer's date, time, and time zone are set correctly, as incorrect settings may affect iTunes connectivity.
Update your security software. Ensure your antivirus or firewall software is up to date, as outdated versions may incorrectly block iTunes.
Run iTunes as an administrator. Right-click iTunes and select "Run as administrator" to ensure it has full system permissions.
Temporarily disable security software. Try turning off your antivirus or firewall temporarily and check if iTunes works normally. If it does, adjust the settings to allow iTunes access.
Perform a clean uninstall if necessary. Some security programs may continue running background services even after being disabled. In such cases, use the official cleanup tool to fully remove the software and eliminate potential conflicts.
6. iTunes Backup Is Corrupted or Incompatible
Sometimes, iTunes may show errors indicating that your backup is corrupted or incompatible. This usually happens due to interrupted backup processes, software issues, or damaged backup files.
Here are some effective solutions to fix the problem:
Check if a backup exists. Open iTunes, go to Preferences > Devices, and check whether a backup file is listed. If it appears there, the backup was created successfully.
Try restoring or reusing the existing backup. If the backup is detected but cannot be used properly, the file may be partially corrupted. In this case, you can attempt to restore it again from the existing backup.
Use third-party recovery tools. Tools such as Coolmuster iPhone Backup Extractor, iBackup Viewer, iExplorer, or similar software may help extract data from corrupted iTunes backups and recover important files.
Delete and create a new backup. If the backup is severely damaged, deleting the existing backup and creating a new one is often the most effective solution. To manually delete a backup, locate the backup folder here:
Windows: C:\Users\USERNAME\AppData\Roaming\Apple Computer\MobileSync\Backup\
Mac: ~/Library/Application Support/MobileSync/Backup/
Try basic troubleshooting steps. Restart your devices, update iTunes, and change the USB cable or port, as these simple fixes can sometimes resolve backup-related issues.
7. Not Enough Space to Restore iPhone or iPad
If you see an error indicating that there is not enough space to restore your iPhone or iPad, it usually means your device does not have sufficient storage to complete the restoration process. Here are some effective solutions you can try:
Check available storage on your device. Make sure your iPhone or iPad has enough free storage space. If storage is full, delete unused apps, photos, or files to free up space before trying again.
Update iOS and iTunes. Ensure that both your iOS device and iTunes are updated to the latest version, as outdated software may cause restore errors or compatibility issues.
Restart your devices. Restart both your iPhone/iPad and computer, then attempt the restore process again. This can help clear temporary system glitches.
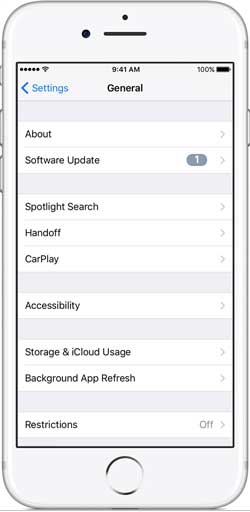
Check security settings and restrictions. Some security settings or restrictions on your device or computer may interfere with the restore process. Temporarily disable them and try again.
8. How to Fix a Corrupted Lockdown Folder
A corrupted Lockdown folder can prevent iTunes from properly communicating with your iPhone, iPad, or iPod. This may lead to connection errors, backup failures, or device detection issues.
To fix this problem, you can reset the Lockdown folder by following these steps:
Close iTunes and disconnect your device. Make sure iTunes is completely closed before starting the process.
Open the Lockdown folder location.> On Windows, press Win + R, type %ProgramData%, and press Enter.
Navigate to the Apple folder. Open the folder named Apple, then locate the Lockdown folder inside it.
Delete the Lockdown folder. Right-click the Lockdown folder and delete it. You may need administrator permission to complete this step.
Restart your computer and reconnect your device. After deleting the folder, restart your PC and reconnect your iPhone or iPad. iTunes will automatically recreate a fresh Lockdown folder.
Note: You must have administrator privileges to delete system-level folders. If you are using a standard user account, switch to an administrator account first.
9. iTunes Fails to Sync with iPhone, iPad, or iPod
If iTunes fails to sync with your iPhone, iPad, or iPod, the issue is usually caused by outdated software, connection problems, or incorrect sync settings.
Try the following solutions to fix the problem:
Update iOS and iTunes. Make sure your iPhone, iPad, iPod, and iTunes are all updated to the latest version. Then restart iTunes and try again.
Use a USB connection first. Even if you normally use Wi-Fi syncing, connect your device to the computer using a USB cable to establish a stable connection.
Reset sync settings in iTunes. In iTunes, select your device, disable Wi-Fi syncing temporarily, and turn off automatic syncing options. Click Apply, then restart iTunes.
Restart all devices. Close iTunes, disconnect your device, and restart your iPhone/iPad/iPod as well as your computer.
Re-enable syncing. After restarting, reconnect your device, relaunch iTunes, and enable Wi-Fi syncing again if needed. Then attempt to sync your data.
10. Firmware Is Not Compatible with Your iPhone
If iTunes displays a message stating that the firmware file is not compatible with your iPhone, the IPSW file you are using may not match your device model or iOS version. This issue can also occur if iTunes is outdated or the firmware file is incomplete.
Try the following solutions:
Restart your computer and try again. Temporary system glitches can sometimes cause firmware verification errors.
Update iTunes to the latest version. An outdated version of iTunes may not recognize newer firmware files correctly.
Temporarily disable antivirus software. Some security programs can interfere with firmware verification or the restore process.
Download the correct firmware file. Make sure the IPSW file matches your exact iPhone model. Using firmware designed for a different model will result in a compatibility error.
Verify the firmware file. If the download was interrupted or corrupted, delete the IPSW file and download it again from a reliable source.
Check Apple signing status. iTunes can only install firmware versions that Apple is currently signing. If the firmware is no longer signed, the restore process may fail even if the file matches your device.
After verifying the firmware file and updating iTunes, reconnect your iPhone and attempt the restore process again.
11. iTunes Crashes When Syncing with iPhone, iPad, or iPod
If iTunes crashes during the syncing process, the issue may be caused by corrupted preferences, incompatible plug-ins, damaged user profiles, or software conflicts.
Try the following solutions:
Launch iTunes in Safe Mode. Hold down Shift + Ctrl (Windows) while opening iTunes. Continue holding the keys until you see the message indicating that iTunes is running in Safe Mode. Then attempt to sync your device again.
Update iTunes. Make sure you are using the latest version of iTunes, as updates often fix stability and syncing issues.
Restart your devices. Restart both your computer and iPhone, iPad, or iPod, then try syncing again.
Create a new user account. On Windows, go to Control Panel > User Accounts > Manage Another Account > Create a New Account. Log in to the new account and test iTunes there. This can help determine whether the issue is related to a corrupted user profile.
Disable third-party security software temporarily. Antivirus programs and firewalls can sometimes interfere with iTunes syncing. Temporarily disable them and test the sync process again.
If iTunes continues to crash after trying the above solutions, contact Apple Support for further assistance.
12. iTunes Stuck on "Preparing iPhone for Restore"
Sometimes, iTunes may become stuck on the "Preparing iPhone for Restore" screen and fail to proceed with the restoration process. This issue is often caused by outdated software, connection problems, or temporary system glitches.
Try the following solutions:
1. Open iTunes on your Mac or Windows PC and make sure you are using the latest version.
2. Use an original or certified USB cable and connect your iPhone directly to the computer. Avoid using USB hubs if possible.
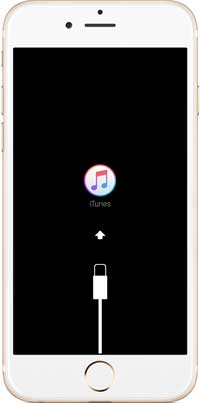
3. Turn off your iPhone first, then connect it to the computer while entering Recovery Mode.
For iPhone 8 or later: Press and quickly release Volume Up, press and quickly release Volume Down, then press and hold the Side button until the Recovery Mode screen appears.
For iPhone 7/7 Plus: Press and hold the Side button and Volume Down button simultaneously.
For iPhone 6s or earlier: Press and hold the Home button and Power button simultaneously.
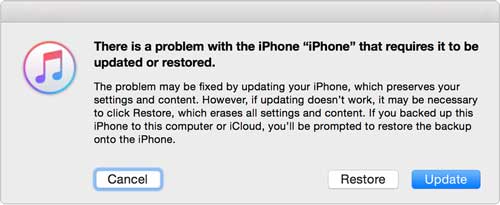
4. When iTunes detects your device in Recovery Mode, a dialog box will appear with two options:
Update: Reinstalls iOS without erasing your data whenever possible.
Restore: Erases your device and installs a fresh copy of iOS.
5. Once the update or restore is finished, restart your iPhone and follow the on-screen instructions to set it up again. (iPhone stuck in Recovery Mode?)
Afterward, you should be able to restore your iTunes or iCloud backup without getting stuck on the preparation screen.
Conclusion
Many common iTunes backup and restore issues can be resolved by simply restarting your iPhone, iPad, or computer. Other frequent causes include outdated iTunes versions, faulty USB ports, or cable problems. Keeping both iTunes and your device up to date is key to avoiding these issues and ensuring smooth backups.
Another often overlooked factor is available storage. Insufficient space on either your device or computer can prevent backups or restores from completing. Freeing up space and retrying the process usually resolves the problem. As a last resort, try using a different USB cable, port, or even a different computer. If it works, you can continue your backups while troubleshooting your primary machine later.


 Free Download for PC
  Free Download for Mac

