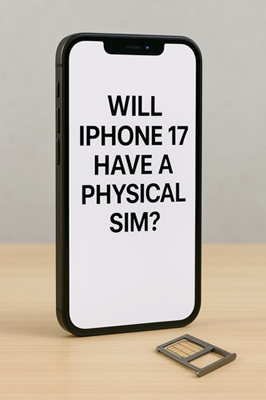
Apple's upcoming iPhone 17 series has generated massive anticipation. While users look forward to new features, one burning question stands out: Will iPhone 17/iPhone 17 Pro/iPhone Air have a physical SIM?
Well, in this article, we will show you everything you want to know about SIM card. We'll look at Apple's SIM card history, the advantages and drawbacks of eSIM, how to set up eSIM on iPhone 17, and how to transfer your data seamlessly from your old phone.
Over the past decade, Apple has gradually pushed the shift from physical SIM cards to eSIM:
This clear trajectory shows Apple's determination to make eSIM the new global standard.
Will the iPhone 17 series have a SIM card slot? Based on past models and industry predictions:
Since Apple is likely to keep pushing toward an eSIM-only future, it's important to understand what this change actually means for users. Just like any new technology, eSIM brings both advantages and potential drawbacks. Let's take a closer look at the pros and cons of using eSIM in the iPhone 17.
| Pros of eSIM | Cons of eSIM |
| More compact design (no SIM tray required). | Limited support in certain regions and by smaller carriers. |
| Enhanced water and dust resistance. | It can be confusing for first-time users. |
| Easier carrier switching without needing a physical SIM card. | Complicated for international travelers in areas with no eSIM availability. |
| Flexible global connectivity via travel eSIM providers. | Some users face difficulties transferring eSIM between devices. |
As the iPhone 17 increasingly moves toward full eSIM adoption, knowing how to set up an eSIM correctly is becoming essential for users. Apple offers several methods to install and activate an eSIM, tailored to different carriers and usage scenarios. Here are three common approaches:
Most carriers provide either a physical card with a QR code or an email when activating an eSIM. By scanning this QR code, you can quickly download the carrier's eSIM profile onto your iPhone 17.
Step 1. Open the Settings app on your iPhone 17.
Step 2. Tap "Cellular" > "Add eSIM".
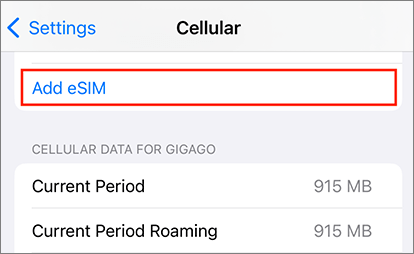
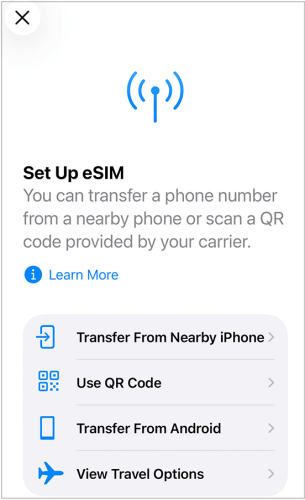
Step 3. Select "Use QR Code" when prompted.
Step 4. Scan the QR code provided by your carrier using your iPhone 17's camera.
Step 5. Follow the on-screen instructions to complete installation and activation, then wait for the signal to appear.
Note: Make sure your iPhone 17 is connected to Wi-Fi to ensure the eSIM profile downloads smoothly.
Some carriers, such as AT&T, T-Mobile, and Verizon, are deeply integrated with Apple's system and support automatic eSIM activation. This means that when you set up your iPhone 17 for the first time, it can automatically detect your carrier and configure the eSIM without scanning a QR code.
Step 1. Turn on your iPhone 17 and follow the on-screen setup instructions.
Step 2. When you reach "Cellular Setup", select "Use Carrier Activation".
Step 3. Your iPhone will automatically communicate with the carrier's server and download the eSIM profile.
Step 4. Wait a moment; when your carrier's network signal appears on the screen, the eSIM is activated.
Note: If the eSIM does not activate automatically, contact your carrier to confirm that this feature is supported.
If you already have an eSIM on your old iPhone, you can transfer it directly to your iPhone 17 using Apple's Quick eSIM Transfer feature, without needing to request a new profile.
Step 1. Ensure both your old iPhone and iPhone 17 are running the latest iOS and are placed close to each other.
Step 2. On your iPhone 17, go to "Settings" > "Cellular" > "Add eSIM".
Step 3. Select "Transfer From Nearby iPhone".
Step 4. On your old iPhone, a confirmation prompt will appear; tap "Agree" to transfer.
Step 5. Wait while the system wirelessly transfers the eSIM information to your iPhone 17.
Step 6. Once complete, your iPhone 17 will automatically connect to your carrier's network.
Upgrading to the iPhone 17 isn't just about changing SIM cards; it's also about moving all your data from your old device to the new one. Whether you're upgrading from an older iPhone or switching from Android to iOS, there are several reliable options. Tools like iCloud or Apple's built-in transfer utilities work well for iPhone-to-iPhone migration, and Move to iOS can help with Android-to-iPhone transfers. However, these methods can sometimes be slow or limited in the types of data they transfer. For a faster, more complete solution, we recommend a professional phone transfer software: Coolmuster Mobile Transfer.
Compatible with both iOS and Android, Coolmuster Mobile Transfer allows you to move a wide range of data between devices without overwriting existing content. Throughout the transfer process, your data remains safe and intact.
What can Coolmuster Mobile Transfer do for you?
Here's an example of transferring data from an old iPhone to a new iPhone 17/17 Pro/Air:
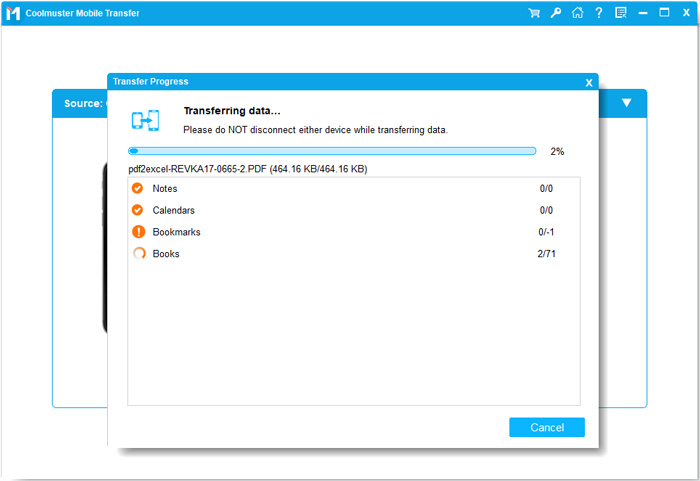
01Install and launch Coolmuster Mobile Transfer on your computer (supports both Windows and Mac).
02Connect both iPhones to the computer using their respective USB cables. When prompted on your iPhones, tap "Trust This Computer". Ensure your old iPhone is set as the source device; if not, click "Flip" in the middle to switch positions. Once connected, both phones will appear as "Connected".
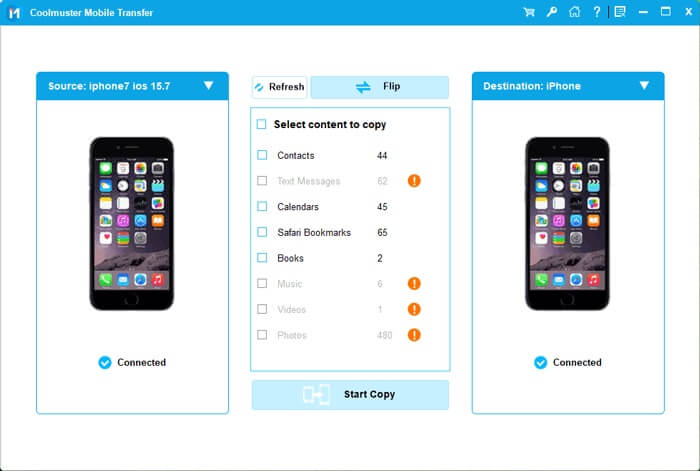
03Check the boxes for the types of data you want to transfer under "Select the content to copy", then click "Start Copy". The software will automatically transfer your data from the old iPhone to your new iPhone 17.
For a clearer walkthrough, you can also watch our step-by-step video tutorial demonstrating the entire transfer process.
The iPhone 17 is expected to push further into the eSIM-only future, at least in the U.S. market. While this offers advantages in design and connectivity, it also means users need to adapt by learning how to set up eSIM and manage their carrier options.
To make the transition smoother, tools like Coolmuster Mobile Transfer ensure your data moves seamlessly from your old device to the iPhone 17/17 Pro/Air. With the right preparation, switching to the new iPhone will be a hassle-free experience.
Related Articles:
How to Transfer SIM Card to New iPhone? Solved in 1 Minute!
Transfer eSIM from iPhone to Android: Ultimate Guide for Smooth Transition
Switching to iPhone? Here's How to Transfer eSIM from Android to iPhone


 Free Download for PC
  Free Download for Mac

