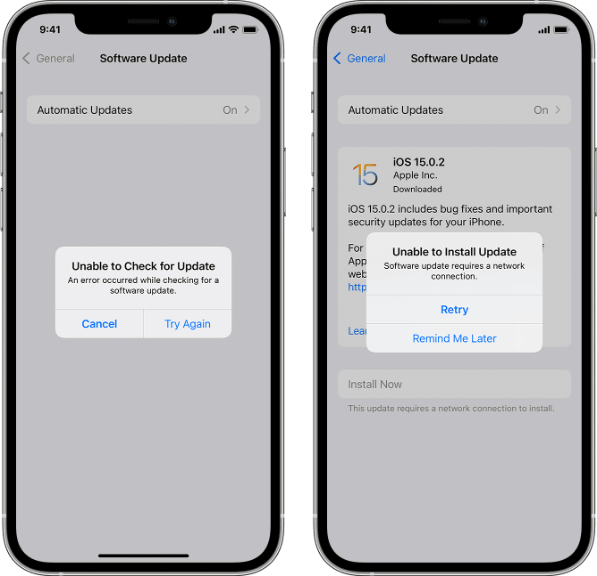
"I have an iPhone 11 Pro with iOS version 16.5.1 (c) on it. I have a red notification balloon on the Settings icon that says there's an update available. When I try to update it, I repeatedly get the following message: 'Unable to Check for Update, An error occurred while checking for a software update. Cancel or Try Again'. Can anyone help? Thanks."
- from Apple Community
Seeing the error "Unable to Check for Update" on your iPhone or iPad can be frustrating, especially when you're trying to install the latest iOS version for better performance, new features, or security improvements. The good news is that this problem is quite common and, in most cases, fixable.
In this guide, we'll walk you through the main reasons behind the unable to check for update error and provide step-by-step solutions to help you resolve it quickly and effectively.
If you encounter the "iOS 26 unable to check for update" issue during the update process, it is usually related to several factors. Understanding these reasons can help you quickly find a solution. Here are some possible causes:
After understanding the possible causes of the "iPad/iPhone unable to check for update" issue, here are detailed solutions for each scenario.
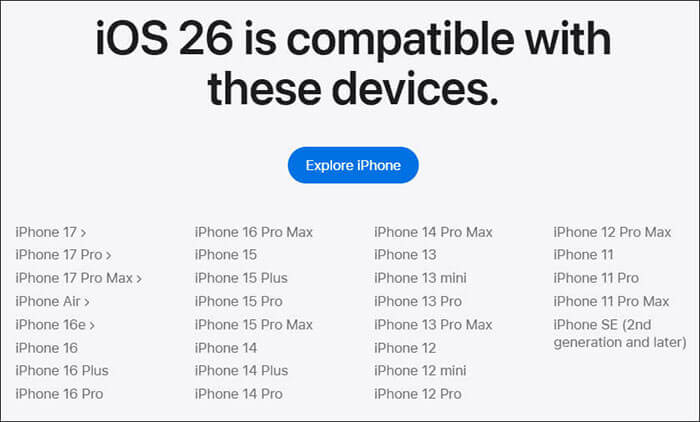
We must be aware that Apple stops providing system updates for certain older devices every year. iOS 26 is only available for certain models, so if your iPhone 13 is unable to check for updates, you should make sure your iPhone 13 supports iOS 26.
Here are the devices that support iOS 26:
The next solution to the iPhone being unable to check for updates is to check the network connection. Make sure your iPhone is connected to a stable Wi-Fi network. If the Wi-Fi signal is weak, try switching to mobile data to see if that resolves the issue. If it still doesn't work, you can reset the network settings on your phone and then try again.
To reset the network settings, follow the steps below:
Step 1. Go to "Settings" > "General" > "Transfer or Reset iPhone".
Step 2. Select "Reset Network Settings" and enter your password to confirm.

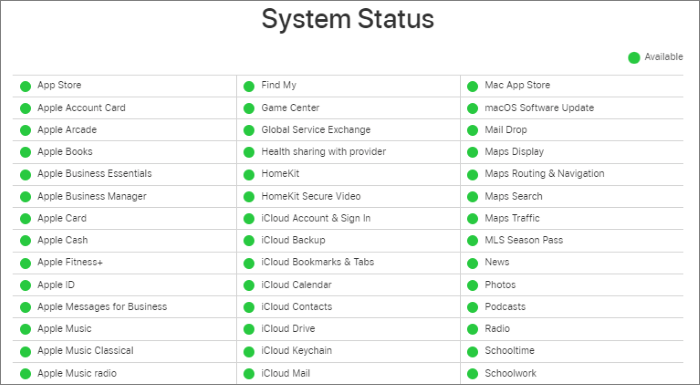
Sometimes, the issue isn't on your end. Apple's update servers may be temporarily down, which can result in the unable to check for update message.
Open your browser, visit Apple's system status page, and check if "iOS Software Update" is green; if it's yellow or red, try again later.
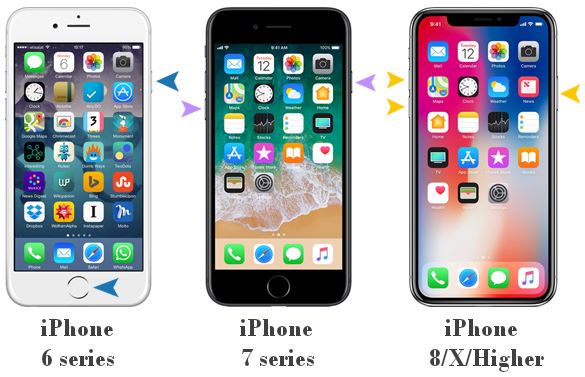
Temporary system errors can also cause iOS 26 to be unable to check for updates. Restarting or force restarting can clear the cache and refresh the system status.
For iPhone X, 11, 12, 13, or later:
For iPhone 6, 7, 8, or SE (2nd or 3rd generation):
For iPhone SE (1st generation), 5, or earlier:

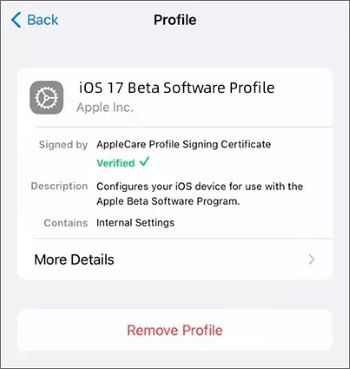
If you've downloaded the iOS 26 beta version on your iPhone or iPad, a new iOS update won't appear in Settings. You'll need to delete the beta first before you can proceed with the update.
Here is how to delete a beta profile:
Step 1. Go to "Settings" > "General "> "Profiles".
Step 2. Find the beta profile, tap it, and select "Remove Profile".
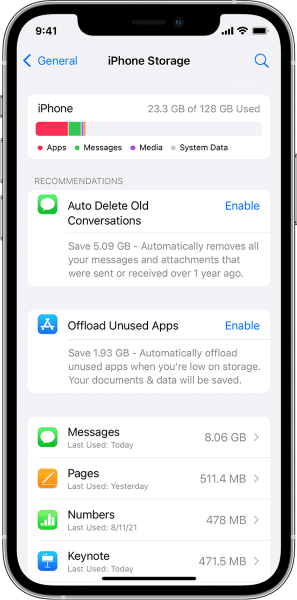
Sometimes, there isn't enough space on your iPhone to download and install the latest update, which can lead to your iPhone/iPad being unable to check for updates. Therefore, you'll need to free up some space to proceed with the update.
Here is how to fix iOS 26 unable to check for updates:
Step 1. Go to "Settings" > "General" > "iPhone Storage".
Step 2. Check the available storage and delete any unnecessary apps, photos, or videos.
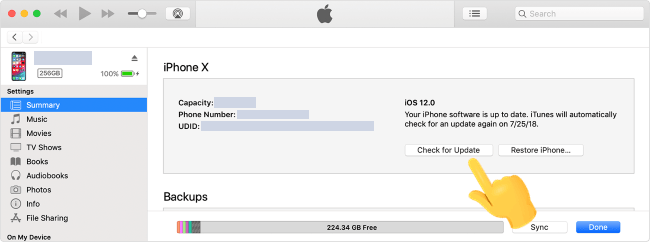
If your iPhone or iPad is still unable to check for the iOS 26 update, you can use iTunes or Finder to update your iPhone. Here are the steps:
Step 1. Connect your iPhone/iPad to your computer and open iTunes (Windows) or Finder (Mac).
Step 2. Select your device and click "Check for Update".
Step 3. Choose "Download and Update" and wait for the process to complete.
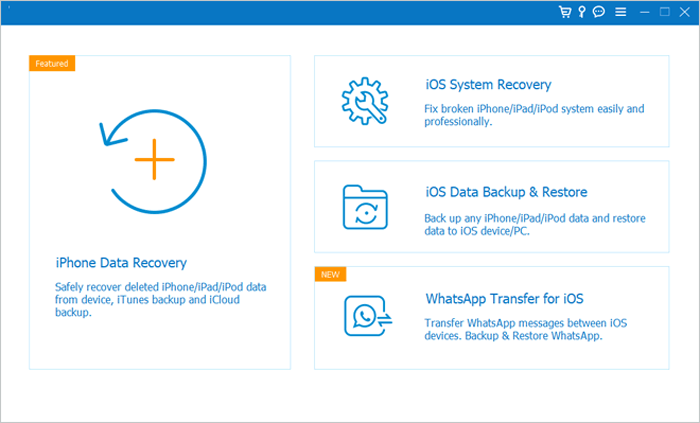
If you have tried all the above methods, but none have worked out, the best solution is to use a third-party tool to update your iOS device. iOS System Recovery tool is one of the best iOS system repair tools that repairs iOS devices to normal in the fastest way possible.
You can use this software to upgrade your iPhone or iPad without data loss. It is also known to resolve an iPhone stuck in recovery mode, a disabled iPhone, an iPhone stuck in the Apple logo, a water-damaged iPhone, and more. In addition, this software is fully compatible with all iOS devices, including the newest models.
Highlights of iOS System Recovery:
Here is how to use iOS System Recovery to fix iPhone 17 unable to check for update:
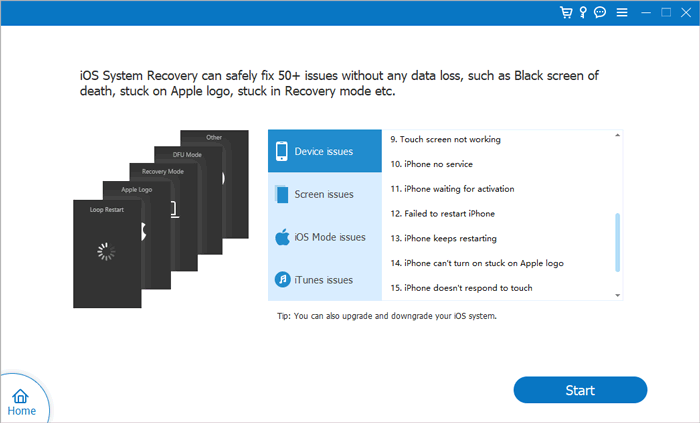
01Install and open the software on your computer. Connect your iPhone via USB and select "iOS System Recovery" to get started.
02The application will automatically detect the issue with your iPhone. Once the problem appears on the screen, click the "Start" button to proceed.
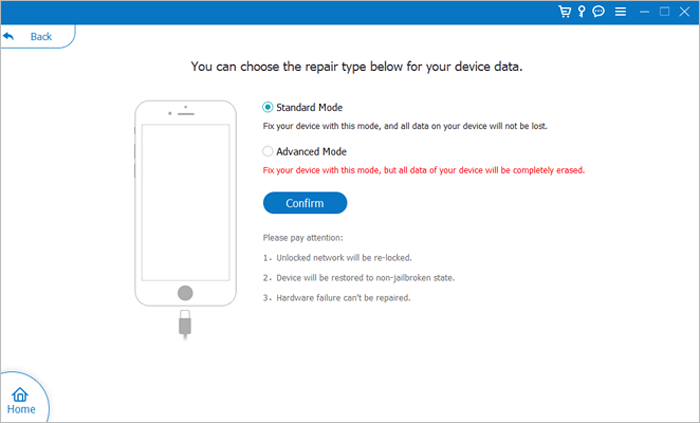
03Choose the repair mode and then click "Confirm" to begin downloading the iOS firmware.
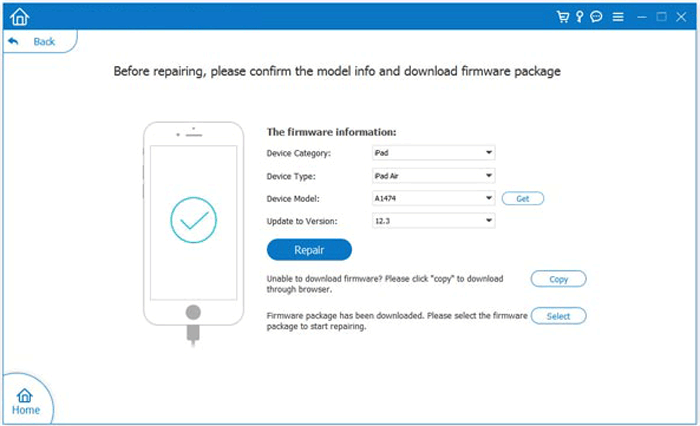
04Review the device information displayed. If necessary, select the correct details from the drop-down menus. Finally, click the "Repair" button to fix the iPhone stuck on checking for updates.
When encountering the "unable to check for update on iPhone/iPad" issue, there's no need to worry too much. With the various methods provided in this article, you should be able to resolve the problem smoothly. If none of the methods work, consider trying the iOS System Recovery tool, which may surprise you!
Related Articles:
iPhone Stuck on Preparing Update iOS 26/18? 9 Fixes That Work Fast
How to Fix iPhone Won't Update to iOS 26 - 10 Proven Solutions
[Solved] How to Fix iPhone Taking Forever to Update iOS 18/26?
New iPhone 17 Stuck on Software Update? Here's How to Troubleshoot


 Free Download for PC
  Free Download for Mac

