Transferring files wirelessly from an Android phone to an iPad is a common need for many users in their daily work and study. Since Android and iPad belong to different ecosystems, direct file transfer like AirDrop is not possible, and many people mistakenly believe they must rely on a data cable or a computer. However, this is not the case. By choosing the right method, you can easily and securely transfer files from Android to iPad wirelessly and quickly. This article will explain in detail how to transfer files from Android to iPad wirelessly. Let's take a look!
If you are setting up a brand-new iPad, Apple's official migration tool is the most secure and system-level solution available. Move to iOS is specifically designed to help Android users move data to iOS and iPadOS devices. However, this method works best for full device migration, not selective file transfers.
Note: This option is only available during the initial iPad setup process.
Here is how to transfer files from Android to iPad wirelessly via Move to iOS:
Step 1. Install Move to iOS on your Android phone from Google Play.
Step 2. Turn on your new or factory-reset iPad and begin the setup process.
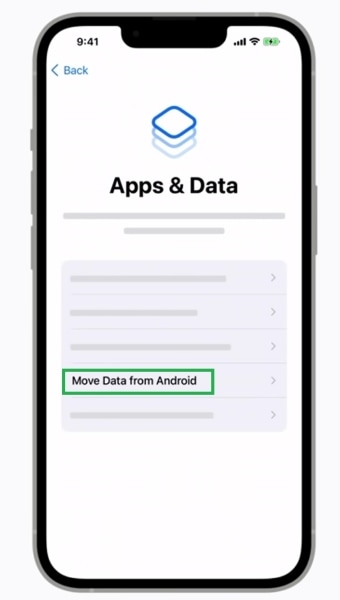
Step 3. On the "Apps & Data" screen, select "Move Data from Android".
Step 4. A verification code will appear on the iPad. Enter the code on your Android device. (Move to iOS code not showing up?)
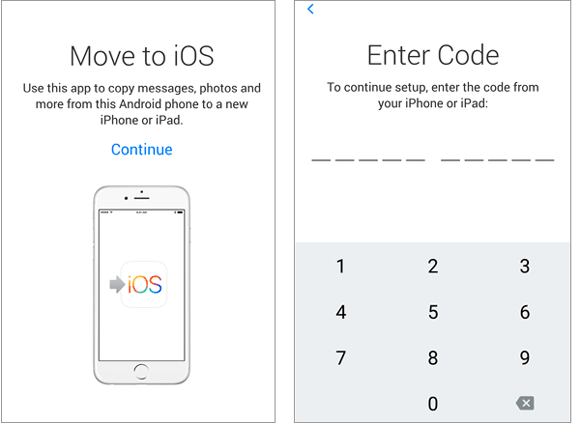
Step 5. Choose the data types you want to transfer and keep both devices nearby until the transfer completes.
For users whose iPads are already set up, cloud storage offers a flexible and platform-independent way to transfer files from Android to iPad wirelessly. This method uses cloud synchronization instead of direct device-to-device transfer. While it depends on internet speed, it allows you to access your files anytime and from any device.
Here is how to move files from Android to iPad wirelessly with Google Drive:
Step 1. Open Google Drive on your Android phone
Step 2. Tap the "+" icon and choose "Upload".
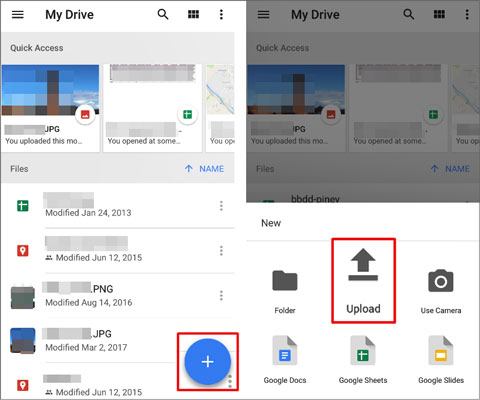
Step 3. Select the files you want to transfer and wait for the upload to finish.
Step 4. Install and open Google Drive on your iPad.
Step 5. Sign in with the same account and download the files.
If you prefer not to upload files to the cloud or install apps, browser-based local transfer tools are a great alternative. Snapdrop allows instant wireless transfers over the same Wi-Fi network.
Snapdrop works similarly to AirDrop but supports cross-platform transfers. Files are sent directly between devices, making it faster and more privacy-friendly for local sharing.
Here is how to send files from Android to iPad wirelessly using Snapdrop:
Step 1. Make sure both your Android phone and iPad are connected to the same Wi-Fi network.
Step 2. On your Android phone, open a web browser (like Chrome) and go to snapdrop.net.
Step 3. On your iPad, open Safari (or any other browser) and go to snapdrop.net.
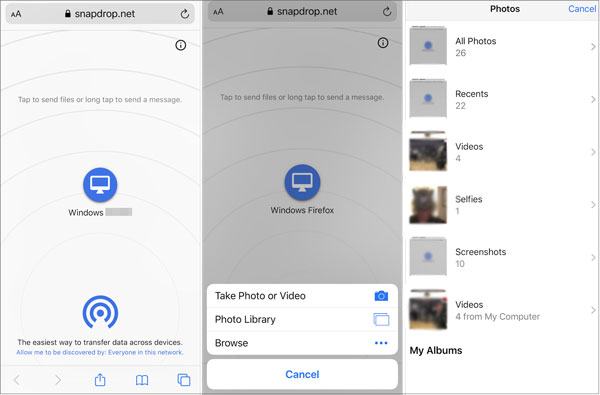
Step 4. Once both devices open Snapdrop, you should see the name of each device appear on the screen. For example, your Android phone will show as "Android", and your iPad will show as "iPad".
Step 5. On your Android phone, click the name of your iPad.
Step 6. After clicking, a file selection prompt will appear on your Android device. Choose the files you want to send (like photos, documents, etc.).
Step 7. Once you select the files, the upload process will start, and the files will begin transferring to your iPad.
Step 8. On your iPad, a notification will appear asking you to accept the incoming files. Tap "Accept" to begin the download process.
Step 9. After the transfer is complete, you can find the received files in your Downloads folder or wherever your browser saves files on the iPad.
Email remains a simple solution for users who only need to move a small number of files and want a method that works everywhere. Although it is not ideal for large files, email is universal and requires no additional setup, making it a good emergency option.
Here is how to transfer files from Android to iPad wirelessly using email:
Step 1. Create a new email on your Android device.
Step 2. Attach the files you want to transfer.
Step 3. Send the email to yourself.
Step 4. Open the email on your iPad.
Step 5. Download and save the attachments.
Wireless methods are convenient, but they may be slow or unstable when dealing with large files. In such cases, a professional phone transfer tool can save time. Coolmuster Mobile Transfer offers an incredibly simple solution to transfer files from your Android device to an iPad with just one click. This software is designed to make the file transfer process effortless and efficient, allowing you to quickly move photos, videos, music, contacts, and other types of data between different devices.
Key features of Coolmuster Mobile Transfer:
Here is how to transfer files from Android to iPad in 1 click:
01Download and install the software on your computer (Windows or Mac). Connect both your Android device and iPad to the computer using the appropriate USB cables. Follow the on-screen instructions to allow the software to detect your devices.
02Once the connection is established, you will see the interface displayed. Ensure that your Android device is set as the Source and your iPad as the Destination. If the devices are swapped, click the "Flip" button to switch them.
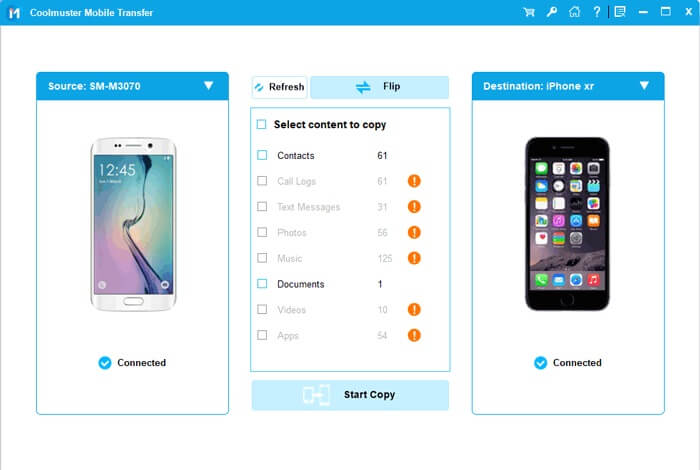
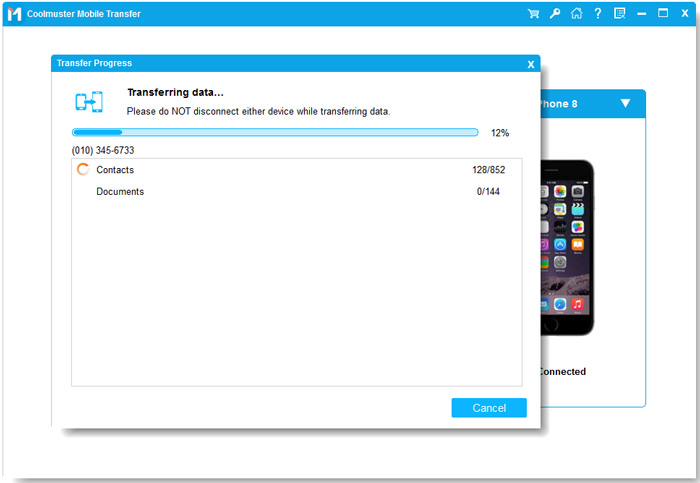
03Select the data you wish to transfer, then click the "Start Copy" button to begin transferring files from Android to iPad.
Video guide
If your goal is to transfer files from Android to iPad wirelessly, tools like Move to iOS, Google Drive, Snapdrop, and Email all offer practical solutions for different scenarios. However, when speed, stability, and large-scale transfers matter most, Coolmuster Mobile Transfer provides a more efficient alternative.
Related Articles:
How to Transfer Videos from Android to iPad with/without Computer
How to Transfer Photos from Android to iPad in 4 Simple Ways? (Updated)


 Free Download for PC
  Free Download for Mac

