With the release of the iPhone 17 Pro, iPhone Air, and iPhone 17, many users are planning to upgrade to the new models through trade-in programs. Trading in old devices not only helps reduce the cost of purchasing a new phone but also minimizes waste from unused devices. However, before handing over your old iPhone, it's crucial to prepare by backing up data, clearing privacy settings, and resetting the device to ensure a secure and worry-free trade-in process.
What to do with iPhone before trading in? This article will guide you step by step on how to prepare iPhone for trade in.
How to get iPhone ready for trade in? The first step in preparing your iPhone for trade in is to make sure your data is safely backed up. This ensures that you won't lose important files such as contacts, photos, videos, and app data when you switch to your new iPhone 17 Pro, iPhone Air, or iPhone 17. Apple provides two main backup options: iCloud and iTunes.
Step 1. Connect your iPhone to a Wi-Fi network.
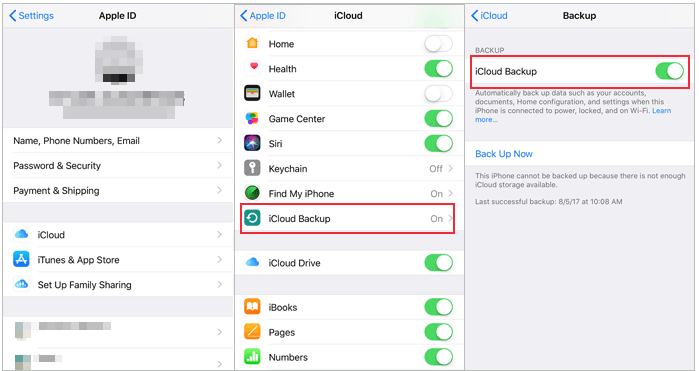
Step 2. Go to "Settings" > [your name] > "iCloud".
Step 3. Tap on "iCloud Backup" and toggle the switch to enable it.
Step 4. Tap on "Back Up Now" and ensure that the process is completed.
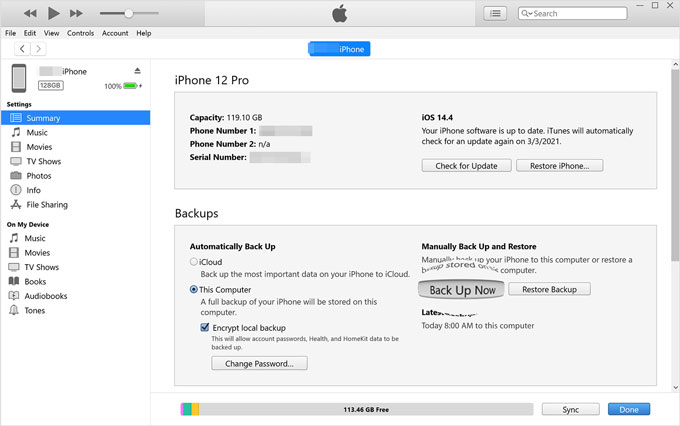
Step 1. Connect your iPhone to your computer and open iTunes (or Finder on macOS Catalina and later).
Step 2. In iTunes or Finder, locate and click on your device icon.
Step 3. In the device "Summary" screen, you'll see several options. Under the "Backups" section, choose "This Computer".
Step 4. Click on "Back Up Now" and wait for the backup to finish.
In addition to the methods provided by Apple officially, you can also use Coolmuster iOS Assistant to back up your iPhone. It offers two options: one-click backup and selective backup. You can choose the backup method according to your needs. Click here to learn how to back up your iPhone to your computer.
After backing up your iPhone, the next step is to sign out of all Apple services. This ensures that the new owner cannot access your personal information or face issues with activation.
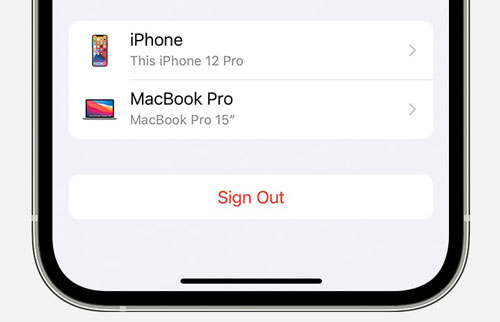
Step 1. Unlock your device and find the "Settings" app on your home screen.
Step 2. Tap on your Apple ID banner at the top of the Settings screen.
Step 3. Scroll down until you see the "Sign Out" option.
Step 4. You will be prompted to enter your Apple ID password as a security measure.
Step 5. Confirm the sign-out process by tapping "Sign Out" again. (Can't sigh out of your Apple ID?)
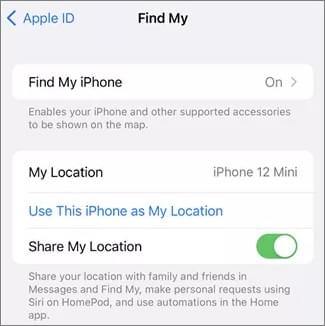
Step 1. Go to the "Settings" app on your device.
Step 2. Select "your name", then go to "Find My" > "Find My iPhone".
Step 3. Switch off the toggle to deactivate "Find My iPhone".
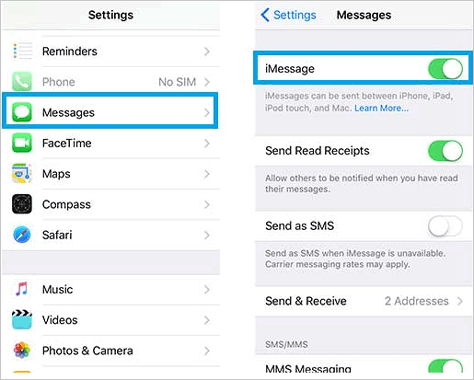
Step 1. Unlock your iPhone and locate the "Settings" app on your home screen.
Step 2. Scroll down and select "Messages" within the Settings menu.
Step 3. Inside the Messages settings, find and select "iMessage".
Step 4. Locate the toggle switch next to "iMessage" and switch it to the off position. This will deregister your device from iMessage.
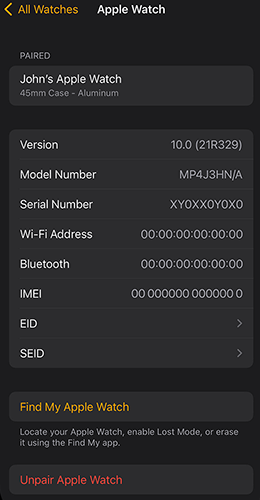
If you plan to trade in your iPhone and it's connected to an Apple Watch, it's essential to unpair them initially. Otherwise, they may remain linked to your old device, causing issues with pairing to your new iPhone 17 Pro or iPhone Air.
Here are the steps:
Step 1. Confirm that your iPhone and Apple Watch are in close proximity.
Step 2. Open the default Watch app on your iPhone.
Step 3. Navigate to the "My Watch" tab.
Step 4. Choose the specific Apple Watch you wish to unpair, and then tap the information button (represented by an encircled "I") next to it on the following screen.
Step 5. Select "Unpair Apple Watch".
Upgrading to a new iPhone is always an exciting experience, but before you hand over your old device for a trade-in, it's crucial to ensure that all your personal data is securely wiped from the device. This not only protects your privacy but also ensures a smooth transition for the new owner. Then, how to clear iPhone before trading it? There are two ways you can try.
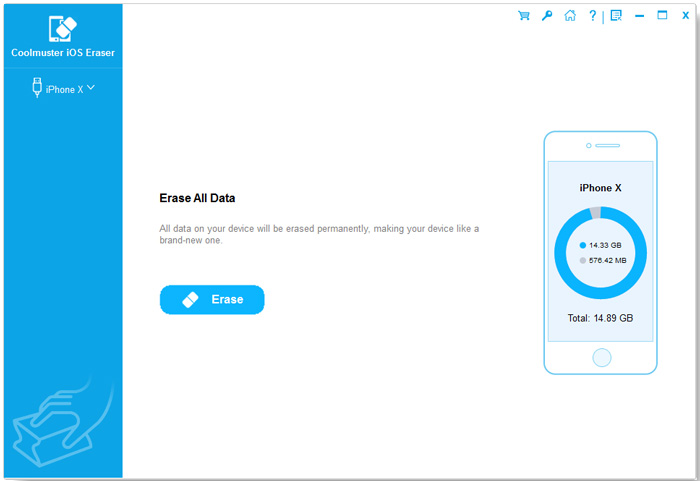
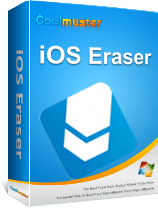
Coolmuster iOS Eraser is a software designed to help users securely and permanently erase data from their iOS devices. With this tool, you can efficiently wipe out various types of data, such as messages, contacts, photos, videos, and more, making it ideal for those who want to sell, donate, or recycle their iPhones, iPads, or iPods. The deleted data cannot be recovered using third-party iPhone data recovery software. So, it's the best choice to wipe iPhone for trade-in.
Key features of iOS Eraser:
Here is how to wipe iPhone before trade-in using iOS Eraser:
01Open the tool after installation. Connect your iPhone to the computer using a USB cable. Subsequently, the software will automatically identify your device. Once your iDevice is successfully connected, you may observe the main interface below and select "Erase" to initiate the data erasure process on your device.
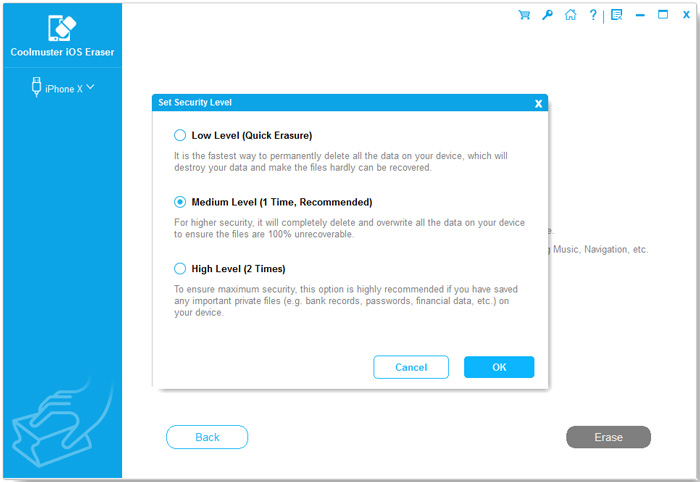
02Select the menu next to "Security Level" to designate the security level for the erasure. Here, you can opt for your preferred security level: Low Level, Medium Level, or High Level. Once chosen, click the "OK" button.
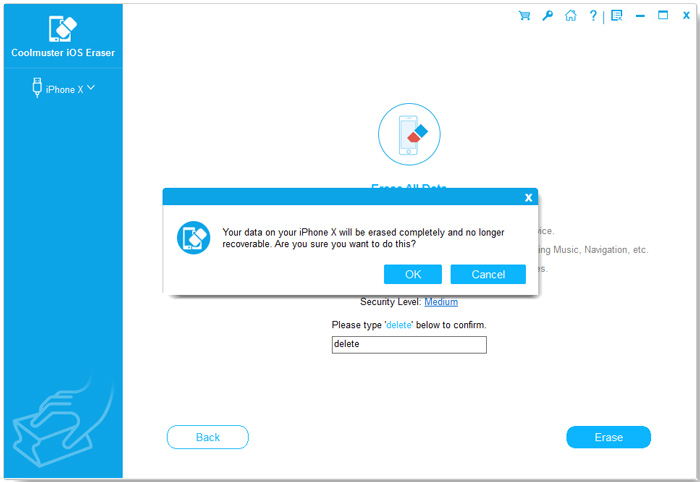
03Enter "delete" into the provided blank to confirm, and then click the "Erase" button. When prompted to confirm the complete erasure of your phone data, click the "OK" button to initiate the process.
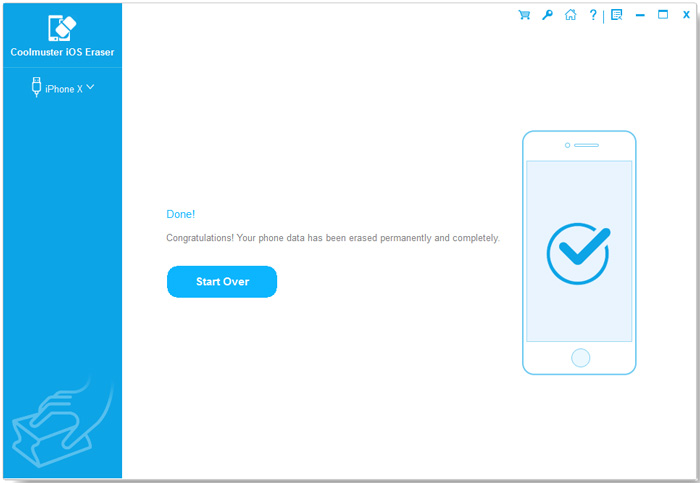
04Following a rapid scan, the program may initiate the immediate erasure of your device data. Once the erasing process concludes, your iDevice will automatically reboot. Upon the completion of the entire process, your phone data will be thoroughly and permanently erased, rendering it unrecoverable.
If you prefer not to use iOS Eraser to wipe your iPhone, you can also restore it to factory settings in the Settings app to delete everything on iPhone. However, please be aware that this method allows third-party software to recover your data.
If you don't mind, here is how to reset iPhone for trade-in via Settings:
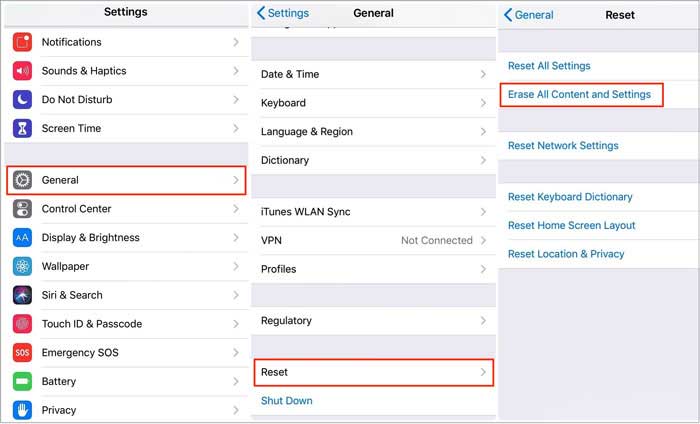
Step 1. Go to "Settings" > "General".
Step 2. Scroll down and tap "Reset".
Step 3. Select "Erase All Content and Settings". If prompted, enter your passcode. (iPhone won't erase?)
Step 4. Confirm your decision by tapping "Erase iPhone". This process might take some time, depending on the amount of data on your device.
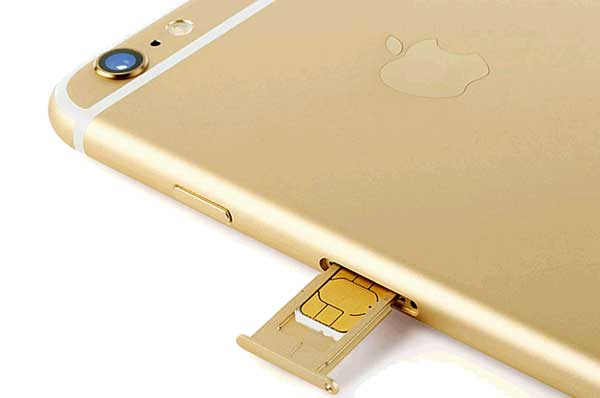
If your iPhone uses a SIM card, be sure to remove it before handing over the device. This is particularly important if you are trading in your iPhone with a carrier or third-party service. The SIM card is associated with your cellular network, and removing it prevents any potential issues for the new owner.
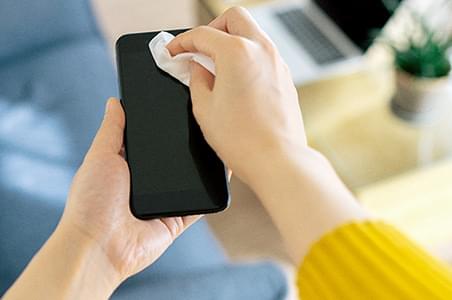
Enhance the trade-in value by showcasing a well-maintained device. Use a soft, lint-free cloth to wipe down your iPhone, eliminating smudges, fingerprints, or dirt. Inspect for physical damage like cracks or scratches—minor wear is typically fine, but substantial damage may impact the trade-in value.
Gather all the original accessories that came with your iPhone, including the charging cable, power adapter, and any other items. Including these accessories can enhance the trade-in value and provide the new owner with a complete package.
Once you've completed the data backup and erasure, what's next? The next step is to find a trustworthy website to sell your used iPhone. A reliable platform not only ensures you get a good price for your device but also helps you avoid any potential transaction issues.
You've probably heard of popular sites like Amazon, eBay, Best Buy, Sprint, and ItsWorthMore.com. These are all well-established platforms that specialize in iPhone trade-ins and offer a smooth, professional process.
Trade-in programs can be a great way to upgrade to the iPhone 17 Pro, iPhone Air, or iPhone 17, but only if you've made the proper preparations. I believe that after reading this article, you should know how to prepare iPhone for trade-in. The most crucial aspect among them is how to wipe an iPhone for trade-in.
Coolmuster iOS Eraser offers a dependable solution for erasing iOS data, whether you're looking to free up space on your device or ensure that your personal information is permanently deleted. By adhering to these steps, you can securely trade in your previous device, ensuring a worry-free transition to your new iPhone 17/17 Pro/Air with no concerns about privacy or data security.
Related Articles:
[Must-read Tips] What to Do Before Getting a New iPhone 17/17 Pro/Air?
Which Is the Best iPhone Data Eraser Software? [A Comprehensive Review]
[4 Ways] How to Clear iPad to Sell Safely and Effectively?
Which Is the Best Phone Transfer Software for Android & iOS in 2025?


 Free Download for PC

 Download for Mac
