Summary:
iTunes Error 9 or iPhone Error 9 can stop you from restoring or updating your device. This guide explains the causes and shows 7 proven fixes, including updating iTunes, restarting devices, checking USB connections, disabling security software, trying another computer, and using iTunes Repair to resolve the error safely.
iTunes Error 9 is not very common, but it is a serious issue that requires troubleshooting on your devices. This error usually occurs when trying to restore or update an iPhone or iPad using iTunes on a Mac or Windows PC. It can be frustrating because it prevents you from completing updates or restoring your data. Here's a simple guide to fix iTunes Error 9 efficiently and safely.
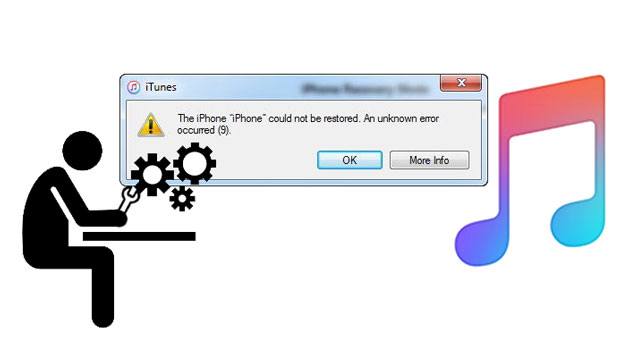
Error 9 is a common iTunes error that usually appears when you are updating or restoring an iPhone or iPad through iTunes. It generally indicates that the connection between the device and the computer was unexpectedly interrupted during the process. In some cases, the error may also be related to software conflicts, security programs, system issues, or hardware problems.
What Causes iTunes Error 9 on iPhone or iPad? iTunes Error 9 may occur due to several reasons, including:
Compared with common iTunes errors such as Error 3194 and Error 4014, iTunes Error 9 is encountered less frequently. However, when it occurs, it can prevent you from updating or restoring your iPhone successfully. Try the solutions in the below one by one to solve the problem.
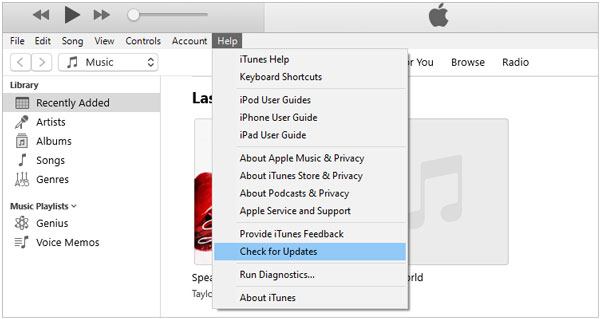
If you frequently encounter iTunes Error 9, it may be caused by an outdated version of iTunes. Apple regularly releases updates to fix bugs and improve performance. Using an older version while updating or restoring your iPhone or iPad can trigger this error. Updating iTunes to the latest version often resolves the problem.
How to update iTunes:
Temporary glitches or misconfigurations on your devices can sometimes trigger iTunes Error 9. Restarting both your iPhone and computer often resolves these issues.
To restart your computer:
To restart your iPhone:

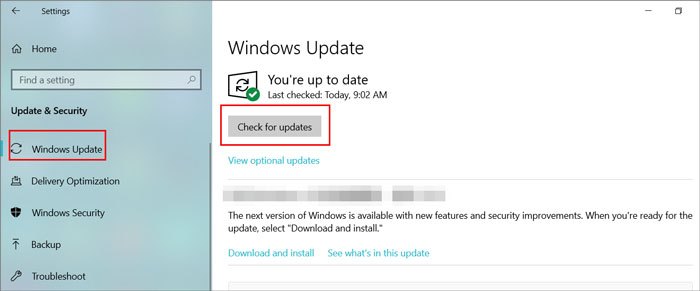
An outdated operating system can sometimes trigger iTunes Error 9. To prevent compatibility issues, make sure your computer's OS is up to date. You should also check that your iPhone or iPad firmware is current. (iTunes Not Recognizing iPhone?)
How to update your Windows computer:
A faulty USB connection can prevent iTunes from updating or restoring your iPhone. This may be caused by a damaged cable, a malfunctioning USB port, or other connection issues.
Tips to ensure a stable connection:
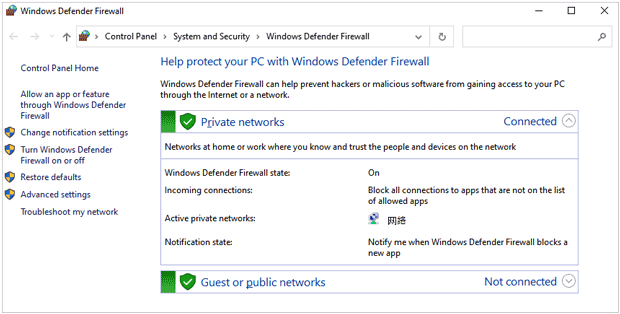
Security software such as antivirus programs or firewall settings may sometimes block the connection between iTunes and Apple servers. This can lead to iTunes Error 9 during an update or restore process. Temporarily disabling these security tools may help identify and resolve the issue.
How to disable security software on Windows:
You can try using another computer if you don't trust the present one. Maybe the computer you are using currently has some issues. So, try another one to see if the iTunes error 9 will seize. But make sure you're using a trusted computer that has decent speed and memory.
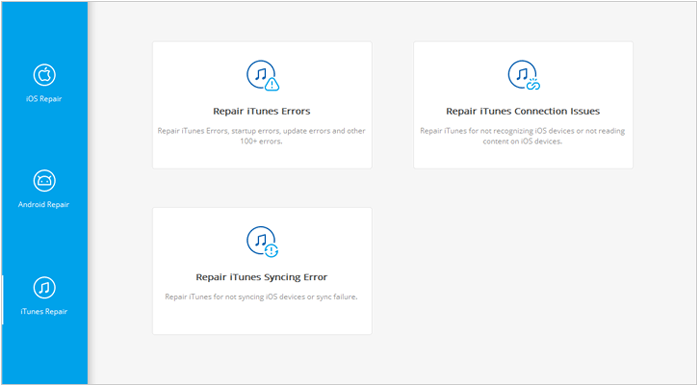
If basic troubleshooting methods don't solve the problem, using a professional iTunes repair tool may be the quickest solution. iTunes Repair is designed to fix various iTunes-related issues, including Error 9, without affecting your existing data. It can also resolve connection problems when iTunes fails to recognize your iPhone or iPad.
Key features of iTunes Repair:
How to fix iTunes Error 9 using iTunes Repair:
01Download, install, and launch the software on the computer and choose the "System Repair" module.
02Go to "iTunes Repair", and you'll see a pop-up window with three repair options. Click on the first option, which is the "Repair iTunes Errors" option.
03iTunes will start to check available components. After checking, click on the "Repair" option to start the repairing process.

If you want to back up or transfer your iPhone/iPad data without relying on iTunes, Coolmuster iOS Assistant is a reliable alternative. It allows you to manage, export, and import data easily while avoiding common iTunes errors like Error 9.
Key Features of iOS Assistant:
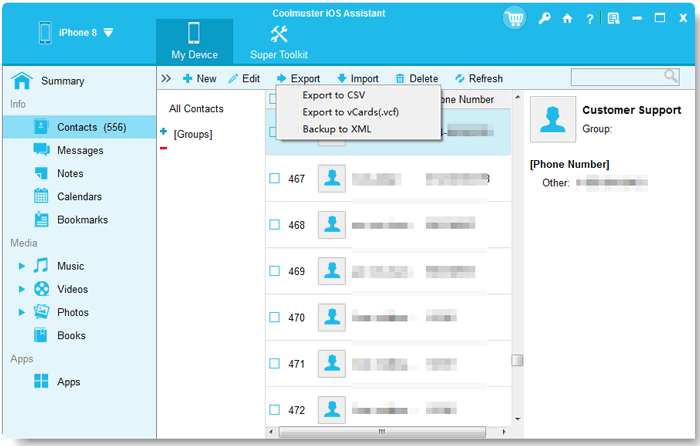
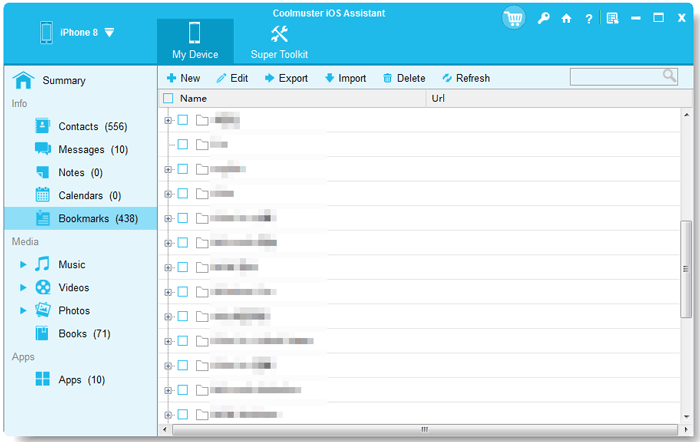
01Download and install Coolmuster iOS Assistant on your computer. Launch the program and connect your iPhone or iPad via USB. The software will detect your device automatically. Once detected, click on the desired data category (e.g., Contacts, Messages, Photos).

02To export data, select the files you want and click Export. Choose the destination folder and confirm.
03To import data from your computer to your device, click New or Import, select the files, and transfer them safely.
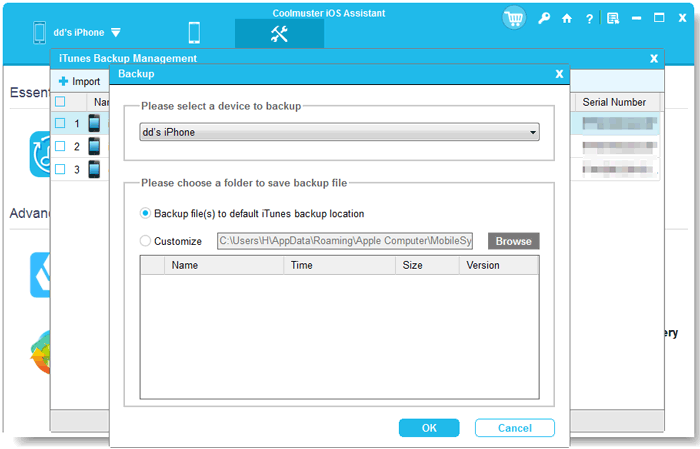
04You can also use the Backup & Restore feature to create a complete backup of your device or restore previous backups.
Once the transfer is complete, safely eject your device and verify the transferred data on your iPhone/iPad.
Video Guide:
iTunes Error 9 can be frustrating, but with the troubleshooting steps outlined above, you can resolve the issue effectively. From checking your USB connection and updating iTunes to restarting devices and testing another computer, these solutions cover the most common causes of the error.
For a faster and safer approach, the iTunes Repair tool can fix over 100 iTunes errors, including Error 9, without risking data loss. Follow these tips, and your iPhone or iPad should return to normal operation smoothly.
Related Articles:
How to Fix iPhone/iTunes Error 1 Easily: Step-by-Step Guide
How to Fix iTunes Backup & Restore Problems on iPhone/iPad


 Free Download for PC
  Free Download for Mac

